In this tutorial, you will learn about Episerver projects and how you can use this new feature to help improve organising marketing campaigns within the CMS. As a content editor, there will often be times when you have a new promotional campaign, a sale, or some big new business announcement that will involve multiple page changes throughout the site. On the campaign start date, you need to publish multiple pages at exactly the same time. Using the page scheduling feature can work in these scenarios, but it's not ideal. Relying on scheduled changes will make it hard for you to preview the campaign in its entirety before it goes live. If you need to change the campaign start date, you will need to update the scheduled publishing date in many areas. In any manual process, content editors will make errors no matter how hard they try. This means you could end up with the content on your website that shouldn't be there 😞😞.
Episerver recognised this issue and instead of ignoring the problem, they developed the Projects feature. Projects is the feature you should turn to within the CMS when you want to schedule multiple things at the same time.
How To Create a Project Within The Episerver Editor
When you log into the Episerver editor, in the top left-hand side navigation panel, click the Settings button.
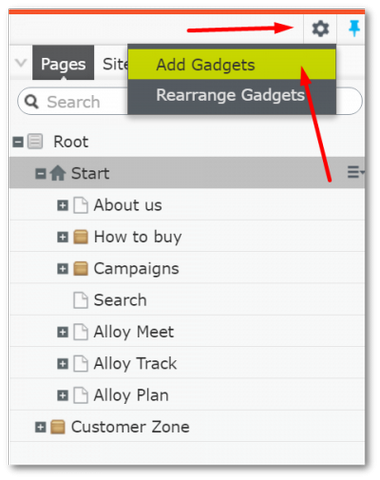
Select Add Gadget from the Settings dialogue.
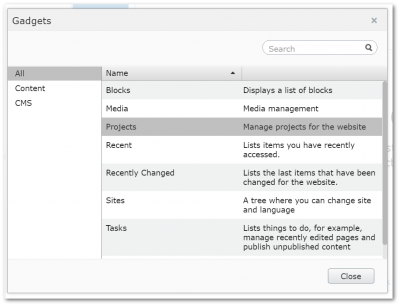
From the Gadgets dialogue, you should see an option named Projects, click on it:
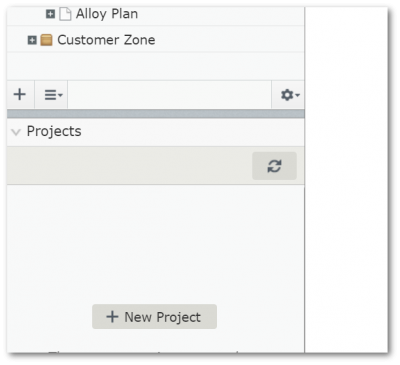
At the bottom of the Navigation Panel, under the Content Tree, you should see a new projects panel. This is where you will create and manage your new projects:
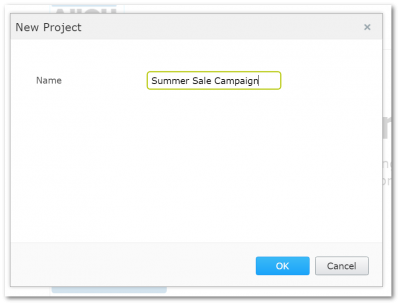
Click the New Project button. Set a name for your project in the New Project dialogue:
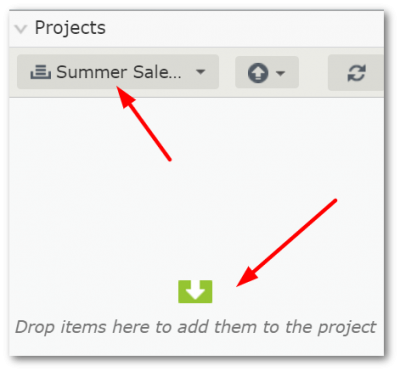
In the Projects, you should now see your new project selected and in the main content you should now see Drop items here to add them to the project. You can now manage CMS wide changes and ad them into a project.

To add a page to the project, within the content tree, find a page you want to include and simply drag it into the project. Make your content amends and when you are happy with the changes, right-click on it and select the Mark as Ready to Publish from the drop-down dialogue:
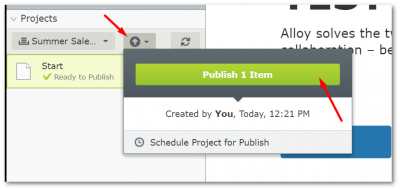
When you are ready to have your campaign published, you can click on the Publish button in the project's gadget and click the big green Publish button:
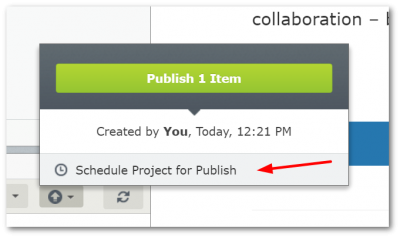
If you don't want to manually publish your campaigns, you can also schedule your campaign so click on the Schedule Project for Publish option in the Projects Publish dialogue. Enter a date and sit back and let Episerver schedule the content for you. Your campaign should now be published! Happy Coding 🤘
