In this tutorial, you will learn how to enable the edit HTML button within the rich text editor in Episerver CMS. A common requirement by content editors is to be able to edit the HTML that is automatically generated within the rich-text area. By default, this feature is turned off in Episerver. Enabling this button can be done in the Episerver admin UI. Best of all, it should only take a few minutes ️🔥️🔥️🔥
In this example, I'm going to enable the HTML button on a content area called 'Main Description' located on my 'Start Page' page type. When adding this button you will need to decide if you want to enable it on a per property basis, or, on a global level. Enabling the button on a global level will require some custom code, which I will cover in a later tutorial! To enable the button on a per property basis, log into the Episerver admin and click on the 'Content Type' tab and locate your page type:

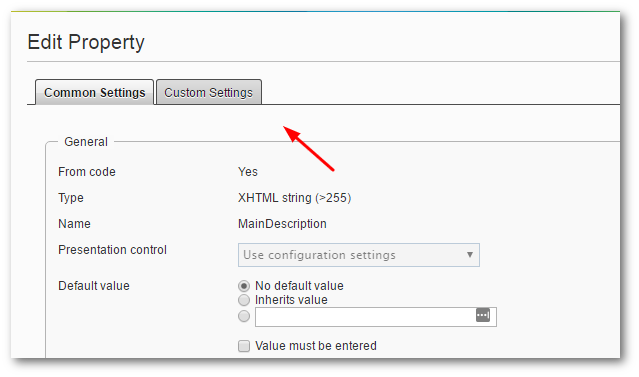
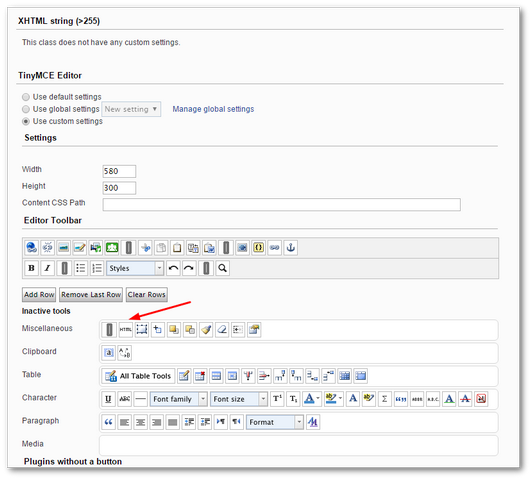
Select the page type you want to edit and then find the field that you want to configure. Episerver uses a plug-in called TinyMCE to power the rich text property. Any TinyMCE powered properties will be marked as type 'XHTML string (>255)' within the CMS. Click on the property name field to load up the properties editing screen. Click the Custom Settings tab and you should see a section called Editor Toolbar on the screen that loads.

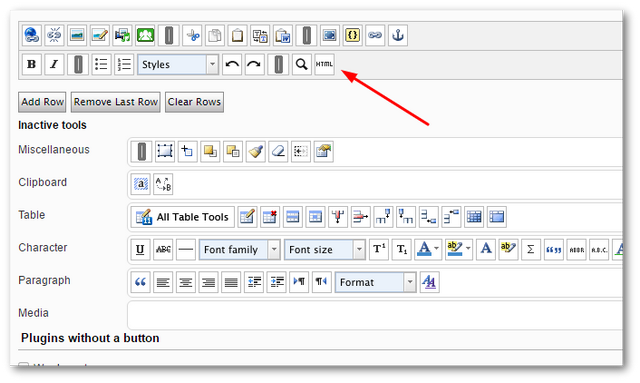
In here you should be able to see a list of buttons that you can enable/disable within the TinyMCE editor. To enable/disable components simply drag them onto the toolbar, or, remove them. To enable the HTML option, find the button called 'HTML'

Drag it onto the TinyMCE toolbar at the position where you want to see it on the toolbar.

Now at the bottom of the page hit the 'Save' button.

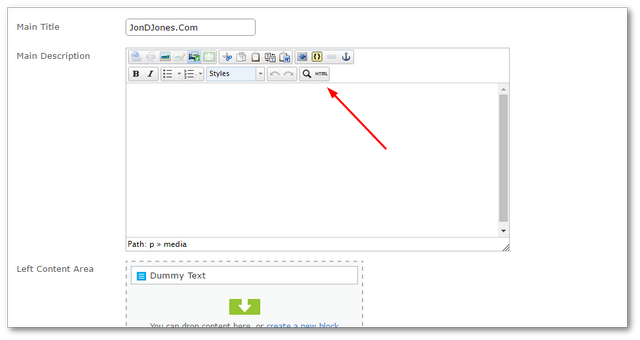
When you go back to the editor and try to create a new page using the page type you selected above, you should see the HTML button on your rich-text property ️🔥️🔥️🔥. Happy Coding 🤘
