In this tutorial, you will learn how to create a global menu tab and menu it within the Episerver CMS editor that links to a custom view. The view will use a custom layout that will be styled so it will feel like an internal Episerver page. This post will assume you know how to create a vanilla MVC view within Episerver. If you do not, I recommend that you read this article first.
The first step is to create this menu item, which is to render a link in the global menu in the Episerver CMS. This will look like this:

There are several ways to add menu items into the global config in Episerver. My preference has always been defining a custom menu provider. You can do this in code like this:
We have a menu item rendering, however, we have a second issue. When we go to our new admin page, we lose all the Episerver styling. You will lose all the navigation, global menu etc... What we ideally want is a custom page that still has the familiar Episerver look and feel. To achieve this, we will need to create a custom layout view. Within this new master layout, you will need to add the same HTML, CSS and Javascript the editor uses.

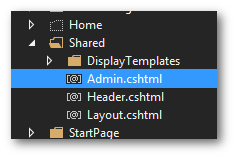
In views ➡ shared, create a new view called admin.cshtml file. In this view, you will need to define the following markup:
Update your default admin page to use this new layout. This process is the same as normal MVC:
With this set-up, when you view the page, it will now look like an Episerver styled page:
 |
|
I think we can agree this looks much nicer than the equivalent:

We've created our own custom global navigation tab and menu item. This item links to a custom controller and view that you defined. We've created a specific Episerver admin layout, so the view looks like an Episerver styled back-end page Job done!
All the above code can be downloaded to a fully working website from my GitHub account here. Remeber to ⭐⭐⭐ it. Happy Coding 🤘
