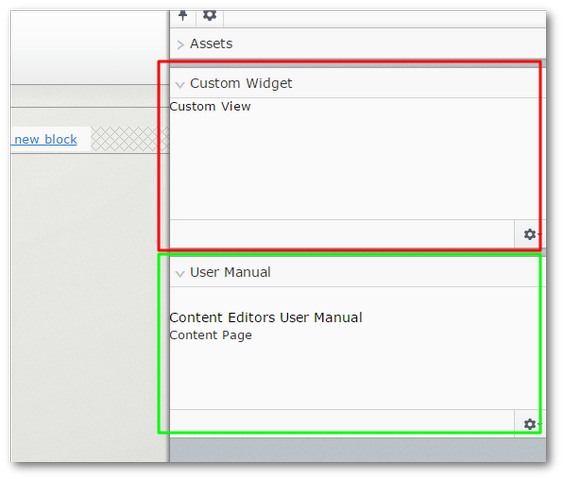
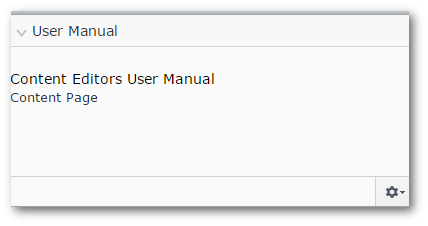
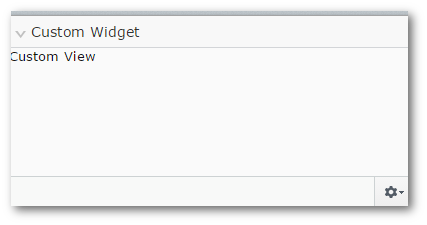
In this tutorial, you will learn how to render your own custom view file within the Episerver CMS assets panel. This can be handy to customise how the CMS works and make content editors lives easier. In this guide, I will walk you through two approaches. One will display a custom static HTML page and one will display a custom view generated via a controller. See the screenshots below to get an idea of what we will be building:

Read on to learn how to build them 🔥🔥🔥
Dojo
We can not go down one route without an understanding of DojoJs. Dojo is a bit of a cursed word around most offices I work in. Dojo is a front-end library that the Episerver editor relies on to work. If you want to customise the Episerver editor, eventually you'll stumble upon Dojo. The annoying thing with Dojo is its lack of mainstream usage. The only application I know that uses Dojo is Episerver. It is a big ask for any developer to learn a whole framework just to be able to create some custom Episerver properties, once or twice a year. Luckily, for today's tutorial, the script that we need to get working is very easy. Just be aware of this limitation if you have grand Epsierver plans!
Defining Our Widget
With Dojo you work with widgets. The first step is to create a class that registers a widget within Episerver. To do this you have to decorate a class with the Component attribute. This attribute can be found within the EPiServer.Shell.ViewComposition namespace. On application start, the CMS will use reflection to scan for any class that contained this attribute. When it finds one, it will register the widget. In the attribute definition, you will need to define the widget meta-data, what should be called, etc...
The code is very simple:
Plug-in Area: Tells Episerver which area to render the widget. In this tutorial, we will focus on the asset panel only. Just be aware there are several other options 😉
Categories: Where to display the widget, in the CMS, Commerce, Find etc..
WidgetType: Tells Episerver where to find the custom JS file that will bootstrap the view
Title: The name that will be displayed within the asset panel
Sort Order: The order in which the panel should be displayed
In WidgetType, I am using a value called jonjones.jondjones This is the JS namespace Dojo will use to find the appropriate JS files we will shortly create This value has to exactly match. The namespace has to be all lower-case, otherwise, Episerver will not find your JS file and will likely throw an error.
Module.Config
Next, if you haven't got one already, you will need to create a modules.config file in your webroot. The contents of this file can look like this:
Notice, how the namespace value in the add dojoModules section exactly matches!! Another important thing to note is that the path attribute is relative to the ClientResources folder. The script will need to live in the ClientResources folder.
Creating The Correct Folder Structure
The last piece of the puzzle is to create the JS file that will load our custom view. In the webroot create the following folders:
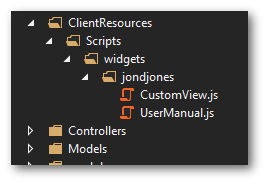
ClientResources ➡ Scripts ➡ widgets ➡ jondjones
In your example swap 'jondjones' with your namespace. This value needs to map to the second part of the namespace defined in WidgetType.

Creating the Dojo Dijit
In the newly created 'jondjones' folder, create the dojo digit file. This file will tell Episerver which view to load. The name of this JS file needs to match the last part of the WidgetType that we defined in the first step, in this case, it was called UserManual:
The declared value needs to exactly match the WidgetType definition. Notice how I mention exactly match a lot. Failing to do this will cause you to enter debug hell! The code above defines all the basic requirements that an Episerver widget needs. Dojo supports several different methods for separating views. The one we will use is the _TemplatedMixin.
The templateString property, defines which view we want Episerver to render in the assets pane. The value of templateString will be the view URL we want to import. If your view does not load via this URL, then obviously the Episerver editor will not render it correctly. Test the view loads correctly in a browser if you bump into issues. If the view is broken, the whole thing will break 😔
The other thing to note is the Url is relative and starts from the webroot. In this example, I have referenced a file in a folder here :
Static ➡ User Guide
This part can be tricky to get right. If you get this file path wrong, the whole editor can break and the panel will fail to load. Debugging can also be annoying due to browser caching. If you make changes to the JS file and nothing happens in the CMS, blame browser caching. When debugging, on each page load it's a good idea to clean your browser internet cache each time. This will of you out the CMS each debug attempt 😔
Creating Your HTML file
This is the last step. As mentioned in the last section you will need to create the following HTML file /Static/UserGuide/ContentEditorsUserManual.html. In order for the view to render correctly all your HTML must be wrapped in two div tags, like this:
After you save the HTML file, load the site up, log into the editor and as long as you copied everything correctly you should see a 'User Manual' tab that displays the content defined in the HTML file in the right-hand asset panel 💥

Displaying a view from a controller
We have displayed a static HTML file.. next let's display a view from a controller. There are two ways we can create views, using the standard MVC controller or the Episerver Controller. I'm going to go with the Episerver one for simplicity. First, create a page type so we can create the page in the Episerver editor:
Next, create a controller. Note how I've added the Authorize attribute to the controller. This means only logged in Episerver editors will be able to view the controller!
The last part is defining the view, remember all the HTML has to be wrapped in two div tags:
After you have created all the files in your webroot, go into the Episerver editor and create a page of type CustomPage and publish it. On your website, load the page up and make a note of the URL. Next in our Dojo Dijit JS file, set the templateStringproperty with that URL value:

If you link to a page in the editor and it gets deleted, the whole of the editor will break. You will have to go into the code and comment out the widget if you want to get the site up and running again. So, that wraps up how you can display custom views in the Episerver assets pane. In the first example, we added a tab that could be used to display a user manual for content editors, for example. In here you could say, add videos, links to PDF's, etc... In our second example, we used displayed dynamic content rendered via Episerver. Adding in custom displays can make your content lives a lot easier.
From my experience with custom display widgets, is that they can be very tricky and finicky to get up and running. If you deleted your page, for example, the whole of the editor breaks. On a production site, this is a bad thing so be careful when you use it. All the above code can be downloaded to a fully working website from my GitHub account here. Happy Coding 🤘
