In this tutorial, you will learn how to switch between the core and maser databases within the Sitecore editor. When you first install Sitecore, three databases will be installed, these are:
Master: The authoring database that contains all your Sitecore items and assets
Core: Contains all the Sitecore objects. If you want to customise Sitecore, this is the place you would define your custom objects.
Web: A lightweight database that only contains the latest published versions of Sitecore assets. This is the database that your website should access
Within the Sitecore editor, it is possible to switch between these different databases in order to access and edit the different content types. If you want to learn how to do this, read on 🔥🔥🔥
How To Switch Between The Core and Master Database in Sitecore
Sitecore uses the Master database by default. When you log into Sitecore, this is the database that you will see. It is not obvious just by logging into the editor which database you are working against, as there is no visible indication on the desktop or the editor that tells you.
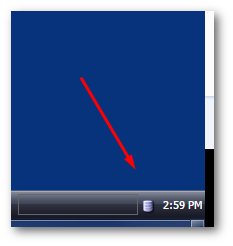
Checking which database is being used is very simple, although not intuitive 😕. Open the Sitecore desktop and at the bottom, next to the time, you should see a server looking icon:

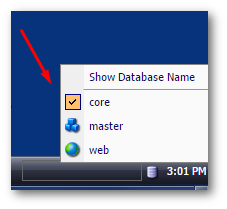
Click on this server icon. You should see a list of the available databases that have been installed. The database Sitecore is currently using should have a little tick next to it:

To switch the database to Web from Master, or, vice-versa, simply select the one you want to work against. Job done 💥
Show The Current Database Name On The Sitecore Desktop
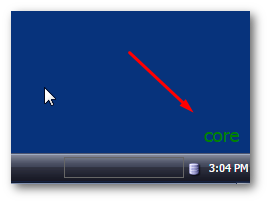
A handy feature to know about is the Show Database Name option. This is available at the top of the database menu in the task manager menu. If you select this, the current database name will always be displayed on the desktop 😊

Happy Coding 🤘
