In this tutorial, you will learn how to import and export content and data created within Sitecore CMS. Moving data between your dev environment and your test/production is a common requirement. To make your life as easy as possible, we want to avoid manually having to re-type in data over and over again for each environment. There are a few ways to import and export content in Sitecore and today you will learn what options you have available to you. I will also show you how to master the most used techniques, packages. If you want to learn the easiest way to transfer your Sitecore content within your architecture, read on 🔥🔥🔥
Import Content Into Sitecore
When it comes to importing content into Sitecore, we have three options:
Team Development for Sitecore (TDS): TDS give you the ability to store all of your Sitecore items within source control. TDS provides the capabilities to import and export templates, layouts, and content objects. Using TDS you can easily move data between environments, all you need to do is merge your TDS items from one branch into another one and everything will import like magic 🪄
TDS works by serializing your Sitecore items into files. TDS can also be combined with a tool like GlassMapper to convert these files into C# classes. Being able to convert Sitecore items into C# classes will allow you to do model based CMS development. This is handy for unit testing and a whole number of cool things. The only downside of TDS is that it costs £800 per license. Each developer in your team will need a license, otherwise, they will not be able to work on the project. If you can afford the license fees (and in the big picture the costs are very trivial), TDS is the approach I would recommend for import and export.
The Sitecore API: Sitecore has a very powerful C# API. If you want to import and export items that might live outside of Sitecore, custom code and APIs will be the path you will need to investigate. For example, if you needed to export Sitecore content into WordPress, you would need to write a custom content migration tool using the Sitecore APIs. Writing custom code obviously takes time and effort, however, writing automated jobs can save you a lot of time in the long run.
Packages: If you want to import Sitecore items into another Sitecore instance without any other tools, package deployment is your best option. In Sitecore, you can create a package, adding whatever files and objects from within the CMS that you want. In the next environment, you simply import the package file and job done💥
How To Create A Package Within Sitecore CMS
On most projects, you will likely use package deployment to import and export content and objects, so let us walk through the process. First, you can also create packages directly in Sitecore. To do this, open the Sitecore dashboard:
Development Tools ➡ Package Designer
From here you can generate a package 😊
It is also possible to generate a package using Sitecore Rocks. To do this, open the Sitecore Rocks Explorer and navigate to the item you want to export and press Shift and right-click. This should highlight it. Repeat this process until you've selected all the files you want to export. One handy tip is that if you want to include child items, you need to right-click on an item and select the include children option.
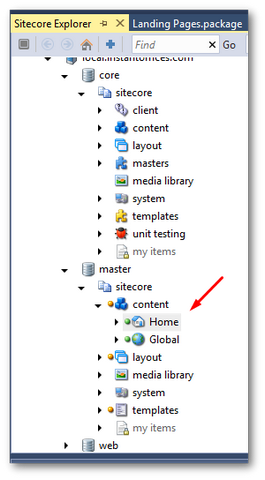
After you have everything you want to export highlighted, right-click on an item and in the Sitecore Rocks context menu, select:
Tools ➡ Create package
Like this:
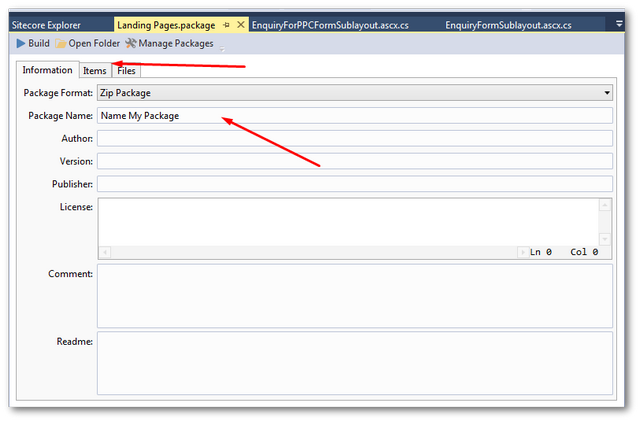
On the next screen, add the package details. In most scenarios, you will be creating throw away internal packages that will only ever be used once, so I don't usually bother filling in too much package information. Usually, I'll just set the package name as the current date and leave the rest. You also might want to check the Items tab to double-check you have added all the content you expect to be exported. When you are happy, click on the Build button and the package manager will create a zip file containing the packages data in it 💥
Importing a Package
Importing a package is also very easy, go to your Sitecore dashboard, select:
Start Menu ➡ Development Tools ➡ Installation Wizard
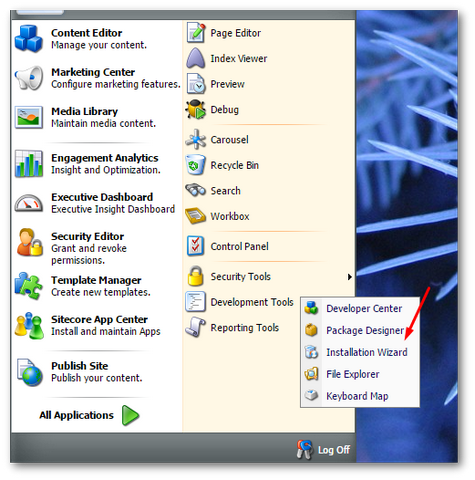
You should now be prompted to upload a zip file:
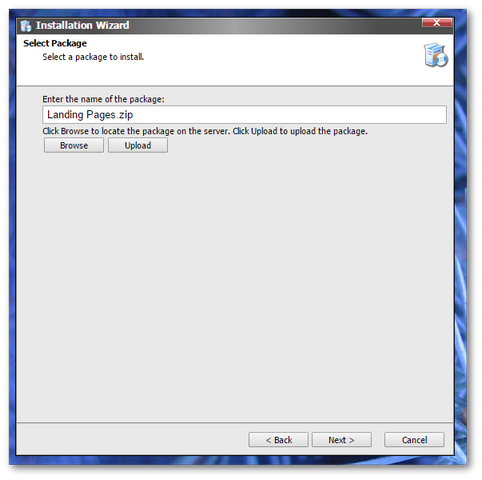
Click on the Upload button and locate the package on your PC. Click Next:
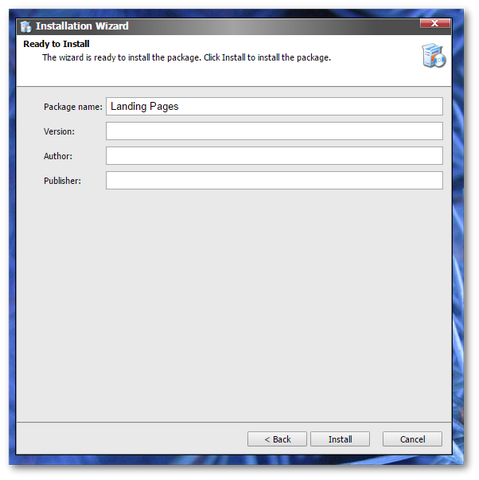
The next screen is just a summary of the contents of the package, as we've created it ourselves, we can skip this. Click the Install' button and sit back and relax 😎. Your content will not be imported:
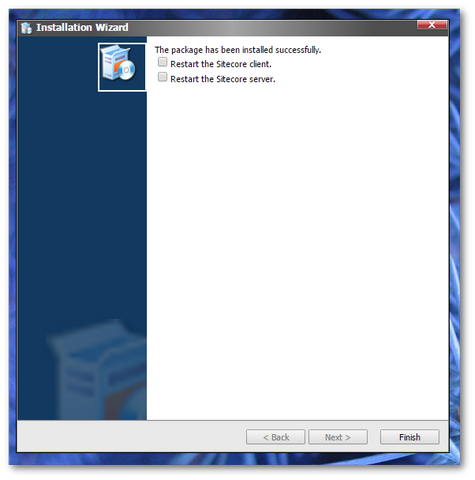
As we're only importing content, you can de-select both the Restart options. With the export process complete, if you look in your Sitecore instance you should see the imported content! Job done 💥
you now know how to import and export content easily with Sitecore CMS. Happy Coding 🤘
