In this tutorial, you will learn how to install and configure the Sitecore Rocks Hard Rock Web Service. Sitecore Rocks has the ability to connect to remote servers running Sitecore via the hard rock web service. In most circumstances, you can configure everything within Sitecore Rocks. If you work within an environment where your servers are locked down, installing this service via the tool might not be possible. The tool will need access to an open port on the remote server. If you find yourself in a locked down environment, you can still get this capabilty working, you will just need to install this module manually on the remote server. If you would like to learn how to do that, read on 🔥🔥🔥
For this tutorial, I'll assume that you have Sitecore Rocks installed and a working Sitecore instance. If you do not know how to install Sitecore Rocks, start here first. You will also need to make sure that your remote Sitecore website is acceblae via a Url!
Installation Files
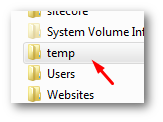
Your first step is to get access to the files required to be installe don the remove server. THe eawsy way to isntall Sitecore Rocks remotely is via source controll and your Ci/Cd pipeline. I recommend copying these installation files into a new directory, rather than cherry-picking the files from my webroot. Create a new folder anywhere on your PC and called it Temp or something similar:
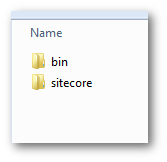
In here, create two folders bin and Sitecore:
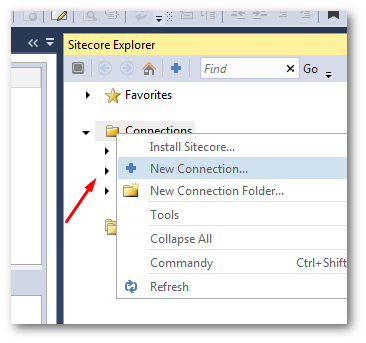
In Visual Studio, create a new dummy Sitecore rocks connection:
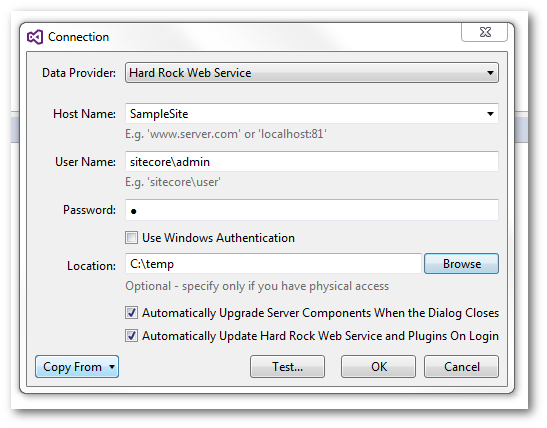
For the connection, point the Host to your existing site (don't worry nothing will be installed), add your Sitecore username and password and set the location to the temp folder you created in Step 1:
If you click Ok' you should see an error, complaining the service doesn't exist.
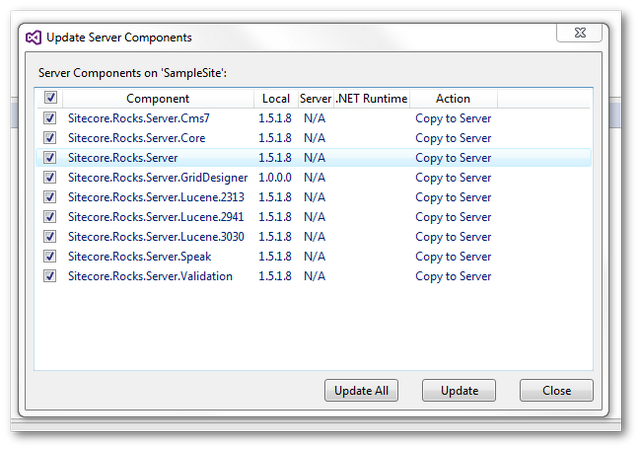
The Update Server Components dialogue should now launch complaining that a number of Sitecore Rocks assemblies are missing. Click the Update All' option, this should copy and create the files you need. After this finishes, if you look within the temp folder you should now see all of the files you need to install on the remote server. In the bin folder, you should see these files:
- Sitecore.Rocks.Server.Cms7.dll
- Sitecore.Rocks.Server.Core.dll
- Sitecore.Rocks.Server.dll
- Sitecore.Rocks.Server.GridDesigner.dll
- Sitecore.Rocks.Server.Lucene.2313.dll
- Sitecore.Rocks.Server.Lucene.2941.dll
- Sitecore.Rocks.Server.Lucene.3030.dll
- Sitecore.Rocks.Server.Speak.dll
- Sitecore.Rocks.Server.Validation.dll
In the Sitecore folder, you should see these files in this folder:
Shell ➡ Web Service:
- Browse.aspx
- Service2.asmx
- Sitecore.Rocks.Validation.ashx
It's these files that make the remote API magic happen. Copy this folder into your websites webroot on the remote server (or use source-controll and Ci/Cd). You will need to copy these files onto every server that you want to connect remotely to.
How To Connect Sitecore Rocks Remotely
After the files are installed on the remote server, connecting Sitecore rocks remotely is very simple. All you need to do is create a new Sitecore Rocks connection and in the 'Host Name' instead of adding a local instance, use your website external Url. You also need to leave the Locationfield blank. When you hit OK now, Sitecore rocks should connect remotely. When I've done the first connection, I've sometimes seen an error message, however, the process still works. Check the connections manager to make sure the sites connected. Job done 💥
In today's guide, you know now how to get the files that will allow to use Sitecore rocks to connect to remote servers. Get a copy of the Sitecore rocks files and copy them directly on the server. Happy Coding 🤘
