In this tutorial, you will learn how to upgrade Sitecore CMS from v7.2 to v7.5. Upgrading a Sitecore instance is never fun. As Sitecore is so customisable, upgrades require so many configuration changes and the upgrade process is flakey, most upgrades will require you to invest a lot of time and effort before you can get your site working, so be warned 😞
A lot of developers within the Sitecore community have their own views and opinions about how to upgrade and which approach can be defined as 'best' practice. Today, I'm going to cover the process I follow when I upgrade a Sitecore website. This process has worked well for me in the past. If you want to upgrade Sitecore, this is the tutorial for you 🔥🔥🔥
Sit Upgrading Preparation Tips
Before starting the following tips will make your life much easier:
Back-up Regularly: Whenever I have tried to run a Sitecore upgrade I have run into a lot of issues. When this happens, I usually need to revert my files and database and start the upgrade process from scratch. This is why I recommend you back-up after doing every major upgrade step. The more you back-up your files during an upgrade, the less further you will have to roll back when things go wrong. During an upgrade, I might make between 3 and 5 backups during the process. Backing up at each key stage will save you a lot of time
Use The Clean Sitecore Instance Architecture: A well known best practice in the Sitecore community is to architect your solution using the clean Sitecore instance approach. In this approach, you add all your custom files within a code library. You basically keep your website project as a clean vanilla Sitecore instance. Whenever you make a change, you publish all your custom files into the clean instance. This approach is discussed in more detail here. Following this architectural practice will make your upgrades easier.
Have Quick Access To Clean Instance Files: When upgrading, a tool like Beyond Compare to compare folders and files is very handy. Being able to compare your config files to that of a clean 7.2 instance and a clean 7.5 instance is very useful. I recommend you create a clean 7.2 Sitecore instance and a clean 7.5. sitecore instance before you start upgrading. If things do go wrong, being able to compare config files and roll them back quickly will save you a lot of time.
Installation Files
The first thing you will need is the correct files. As with any Sitecore upgrade, it is recommended to take an incremental approach and always upgrade to the first base version (in this case 'Sitecore®Experience Platform™ 7.5 rev.141003'). The files you will need are:
Sitecore Web Application InstallerSitecore 7.5 Update PackageUpgradeCMS75_sql.zipDMS75_MigrateDefinitions_sql.zip
If you have all of those files, you are ready to rock n roll 🤘
1. Back-up All The Things
Before you start any form of upgrade, make sure you can roll back and start from scratch if things go awry. Always take a copy of your webroot and code files (that's what source controls for) and your analytics, core, master, and web databases.
2. Upgrade SQL
The first upgrade step is to unzip the upgradecms75_sql file and run UpgradeCMS75.sql against your websites Core, Master, Analytics and Web databases.
3. Prerequisites and Disable Certain Config Values First
You need to disable certain config files, otherwise, the Sitecore upgrade wizard will throw a wobbly and fail. To make the wizard ignore a file you can add the .disabled extension to it. Add this .disabled extension to the following files:
Sitecore.Analytics.configSitecore.Analytics.ExcludeRobots.configSitecore.Speak.configSitecore.EmailCampaign.configForms.config
Just to be safe, I also turned Analytics off within the Sitecore.Analytics.config file. To do this set theAnalytics.Enabled value to false.
On my first upgrade attempt, I encountered a lot of issues. The first thing that caused me some pain was having the latest version of certain key assemblies in my bin directory. I installed a few packages using NuGet and some key assemblies had been upgraded too far. I knew this because when the installer ran, I ran into a lot of version mismatch exceptions. Trying to fix the errors by adding appropriate binding redirects didn't work. Make sure all your assembly versions match and downgrade any that are wrong. Trying to patch the errors with binding redirects in the web.config was a waste of time for me!
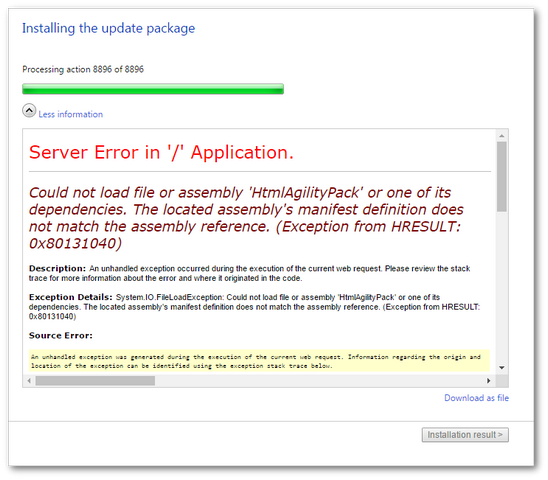
Make sure all the projects in your solution use these versions of these packages:
Json.Net needs to use version 6.0.0.0
HTMLAgility pack needs to use 1.4.6
HTMLAgility pack needs to use 1.4.6
Microsoft.AspNet.WebApi.Core needs to use 5.1.2
After I got through these annoyances I was then hit with a number of analytics issues. The first one I encountered was an invalid connection string issue:
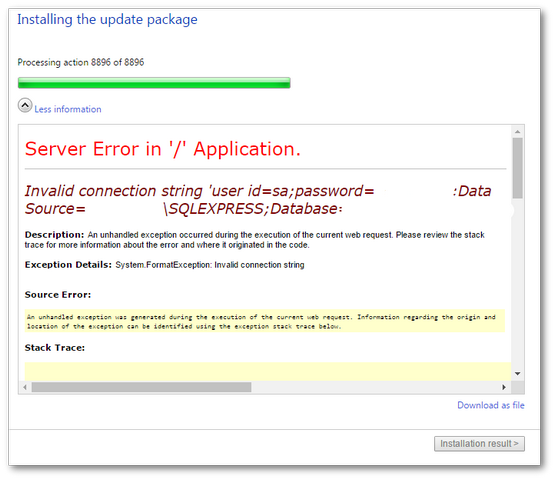
This error occurs when you forget to disable analytics, I tried to fix the issue by putting in a valid analytics connection setting:
After adding the connection details, I tried running the upgrade process again and got this error:
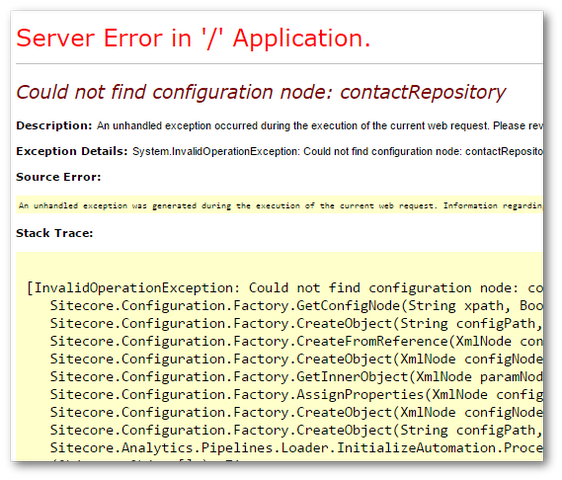
This contacts repository error is related to xDB. The cause is the Sitecore.Analytics.config file. The update wizard can fail before it can upgrade your config files correctly 😞. To get around this you need to make sure you have disabled Sitecore.Analytics.config and Sitecore.Analytics.ExcludeRobots.config. To do that, locate the files within your webroot:
App_Config ➡ Include
Rename the two files like this:
Sitecore.Analytics.config.disabled
Sitecore.Analytics.ExcludeRobots.config.disabled
In Sitecore.Analytics.config, you should also make sure Analytics.Enabled is set to False. After making this change, I re- ran the wizard and bumped into another error:
Could not resolve type name: Sitecore.Pipelines.HttpRequest.OverrideDialogs, Sitecore.Speak.Client (method: Sitecore.Configuration.Factory.CreateFromTypeName(XmlNode configNode, String[] parameters, Boolean assert)).

To resolve this error, you need to disable Sitecore.Speak.config. Sitecore.Speak.config is also found within:
App_Config ➡ Include
Add the disabled extension, like this Sitecore.Speak.config.disabled. If you have installed any custom Sitecore modules, you may have to follow a similar process of adding the disabled extension to each modules config file. After running the installation wizard, I also encountered this error:
Could not resolve type name: Sitecore.ContentSearch.Events.PublishingEventHandler
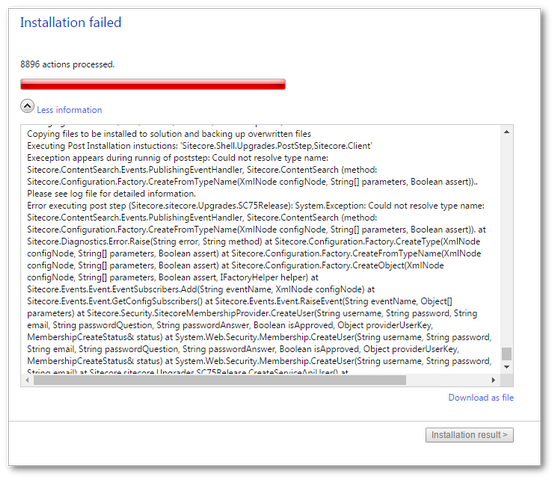
This was an issue with the Lucene search the site in question was using. The error related to Sitecore.ContentSearch.config. To fix the issue, I overrode the existing Sitecore.ContentSearch.config with a version from a clean 7.5 Sitecore install. This file is also located within:
App_Config ➡ Include
I then added the .disabled extension to the end.
4. Run The Update Installation Wizard
You access the Sitecore wizard within the Sitecore editor. You can access this page by going here:
http://local.website.com/sitecore/admin/UpdateInstallationWizard.aspx
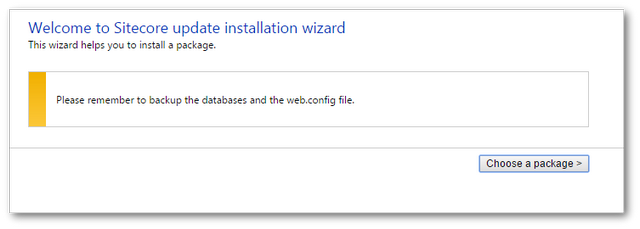
This should load the upgrade wizard:
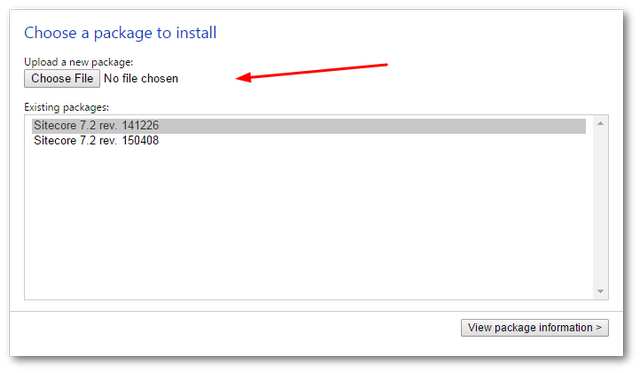
Click Next and select upload the update package:
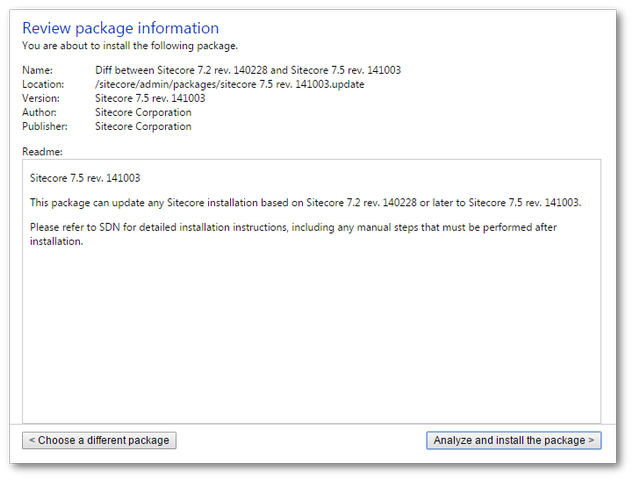
Give the review screen a quick once over and click the Analyze and install the package button.
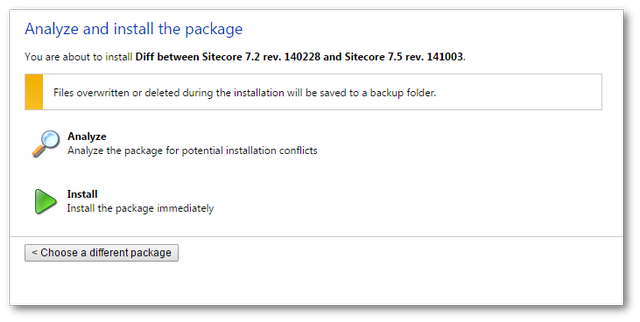
I would recommend choosing Analyze before installation to see if you will encounter any potential upgrade issues:
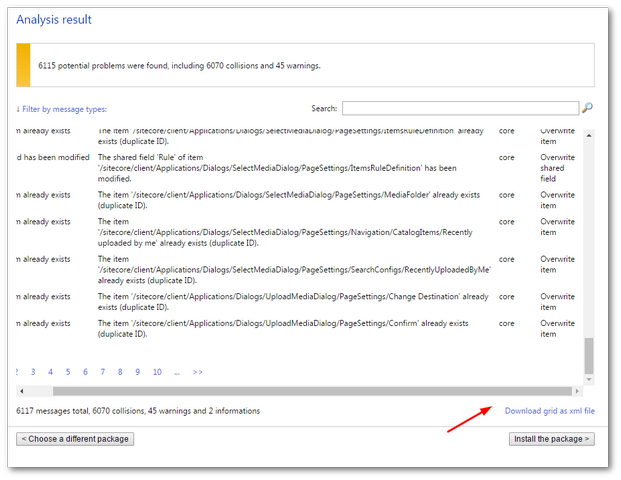
Download the analysis to excel and review it. When you are happy, click the Install the package button:
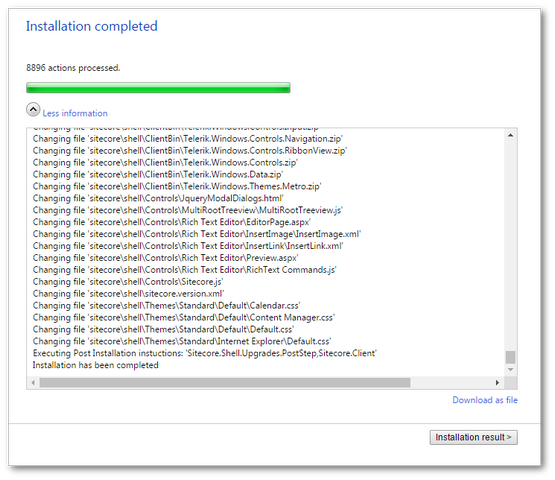
If everything goes to plan the installer should complete successfully. When this happens I recommend making a backup of your new semi-upgraded webroot and database. When we start to add the new config files and assemblies into the solution and re-publish, you do not want to accidentally override any files and not be able to revert your mistake!
5. Install The Reporting Database
The Sitecore Experience Database (xDB) uses two database systems, SQL and Mongo to store the analytics data. SQL is used to store aggregated reporting data, Mongo is used to store real-time experience data. As xDB is new to Sitecore v7.5, when you upgrade you won't have an existing reporting database. To get around this I installed a fresh install of 7.5 and copied the analytics database from the Database folder into my solution:
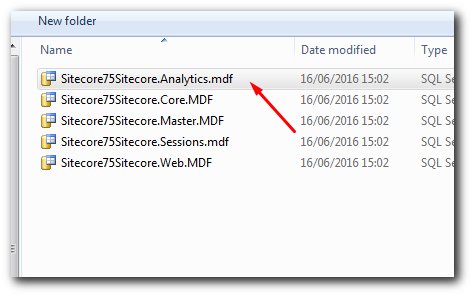
You need to install two SQL databases. One to store the data and one is the temp database used when Sitecore transfers live data from Mongo into the historical data when rebuilding the reporting database is rebuilt. To create these databases, within your database directory, make two copies of the 7.5 analytics MDF and LDF and attach them in SQL. In App_Config, open up ConnectionStrings.config and create two new connection string properties. Your web.config should now look something like this:
6. Updating Configuration Files
Re-enable Sitecore.Speak.config by removing the disabled extension. In the project I upgraded, I didn't need to worry about keeping any existing analytics data or settings. If you are in a similar position, make sure you have a backup copy of your Sitecore.Analytics.config.disabled and Sitecore.Analytics.ExcludeRobots.config.disabled, before deleting them.
As part of the upgrade process, Sitecore should have created two new analytics config files, Sitecore.Analytics.config and Sitecore.Analytics.ExcludeRobots.config. If they are missing, get a copy from a fresh v7.5 install and copy them across. Double-check the connectionstring.config looks OK. You need the following analytics connection settings:
7. Check Sitecore For Required Config Changes
IMPORTANT Head over to Sitecore and have a look at the configuration changes between Sitecore CMS 7 from the official release page. Here you will find a list of configuration changes you will need to make, depending on the upgrade path you have taken. Go through and make sure you have made all the recommended changes.
If your site just uses default settings, the other option is to override your existing files. Use BeyondCompare to see the differences in files and make sure you copy the new changes successfully.
8. Upgrade Search And Refresh Indexes
If you use the content search then I would strongly recommend you read up on some of the potential pitfalls that you will encounter along the way. Upgrading Sitecore Content Search-7-2-to-7-5. Again there are a lot of steps 😞
After updating the search, you need to refresh all the things 🪄
Re-Index Your Search: As with any big upgrade or change in data, it is a good idea to re-index all your search results. If you are unsure of how to do this, I recommend reading, How To Re-Index Your Search Results In Sitecore
Rebuild Your Link Database: During an upgrade, the paths to certain items can change, so Sitecore recommends rebuilding your link database. If you are unsure of how to do this, I recommend reading, How To Rebuild Your Sitecore Link Database
Clear Your Temp Data: Just to make sure nothing is cached from your 7.2 version, you should clean out your Temporary Internet files, clear your browser cache and do an IISRESET.
9. Upgrade Any Modules
If you have any modules installed, like web forms for marketers, these modules may need to be upgraded as well. If you have WFFM installed, I suggest you read, Upgrading WFFM When Upgrading From Version 7.2 to 7.5. For any others Google is your friends, hopefully, 🤔
10. Publish The Site
Finally, after making all these changes you need to publish your site to make sure the publish process still works and your website is using the latest data. You can do this in the editor, within the ribbon click on Sitecore ➡ Publish Site. Click on the Republish option 💥
That's a whole hell of a lot of steps for doing a minor upgrade. This is why Sitecore upgrades are so painful. As each site is different, there is no one-stop shop for Sitecore upgrades. You might follow the advice above and encounter completely different issues than I did. Good luck with your upgrade I am sure there will be a few bumps in the road. Happy Coding🤘
