In this tutorial, you will learn how to fix an issue after you install, or more likely upgrade, the web forms for marketers module within Sitecore CMS. If you notice that your form validation is not working within WFFM, this is the tutorial for you 🔥🔥🔥
Recently, I updated WFFM as part of a Sitecore v7.2 to v7.5 upgrade. After upgrading the module, the required field validator stopped firing whenever a site visitor tried to submit a form without filling in a required dropdown list. To fix issues like this, I recommend you start by looking within the WFFH settings, which you can find within the Sitecore editor here:
Sitecore ➡ System ➡ Modules ➡ Web Forms For Marketers ➡ Settings
This screen will look like this:
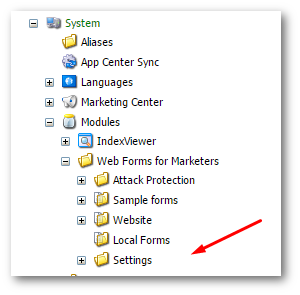
From this screen, you will see all things WFFM, including the validation items, for submission items and a few other treats. As I had a validation issue, the first thing I wanted to do was check that all the upgraded validation items were correct. The easy way to do this is to make a comparison of the values in your sie to the values from a vanilla 7.5 site. Granted this means you need to install a second site, however, I find this is typically the quickest way to move forward.
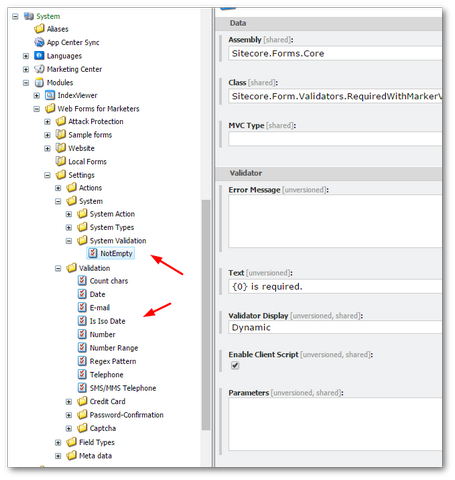
After comparing the two trees, everything looked to be in order. At this point, I went to Sitecore support who recommended I created a custom validator. In the end, a custom validator was not the best fix, however, I'll mention how to do their fix at the end of this tutorial, in case you find it useful.
DropList Required Field Validation Error: Instead of writing a custom validator as recommended by support, I fixed the issue within Sitecore. I compared the HTML between WFFM v2.4 to 2.5. This HTML comparison can be seen below:
Working: This is the working HTML
Broken: This is the broken HTML
In case you didn't spot it, the main difference between the two is that the data-value item is empty on the existing working one, however, it is populated on the upgraded version:
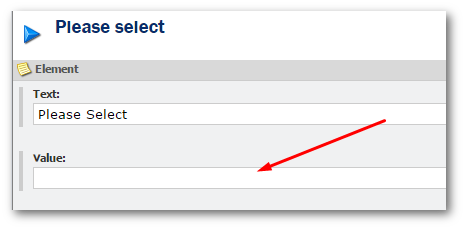
When I looked at my Please Selectitem, its value was empty. In previous versions of WFFM, an empty value would output an empty value. From WFFM v 2.5 upwards, the text property is rendered as the value if that field is empty. In my situation, the value Please select was being rendered as a value on the form. This now explains why the required field validator on the drop list stopped working, when the form was submitted it contained a value 😔
To fix the issue, simply add a few blank spaces into the value field. This simple tweak ensured the value was rendered empty. This empty field then allowed the form validation to work as expected:
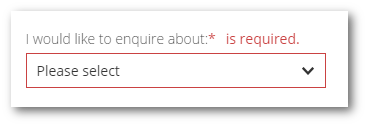
You should now have a working form 🔥🔥🔥
Create A Custom Validator: If you want to know how to create a custom validator as recommended by Sitecore support, let's cover that. To create a custom validator you need to override the related default required field validation items. These items can be found in two locations within the master database:
System ➡ System Validation
and:
System ➡ Validation
As seen below:
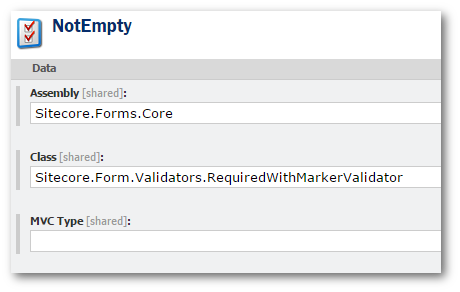
To override the default WFFM required field logic, locate the NotEmpty item. This is found here:
The value of the class property defines the code that Sitecore will call when a form validation request is made. If you want to create your own custom validator, you would create a new class that implements RequiredFieldValidator. If you are unsure of what code to write, you can use a tool like DotPeek to see what the code looks like within Sitecore.Form.Validators.RequiredWithMarkerValidator. To save yourself some time, this is the code:
This code isn't that helpful, however, if you look in the base class, RequiredFieldValidator, you can find the EvaluateIsValid() method:
To create a custom validator you can use this logic as your foundation and then tweak it to meet your needs.
Happy Coding 🤘
