In this tutorial, you will learn how to create a master layout and apply it to a page within a Umbraco CMS-powered website. MVC layout within Umbraco. Let us get to business 🔥🔥🔥 First, log into the Umbraco backend. Within the Settings section in the left-hand main menu, right-click on the Document Types folder and select Create. To keep Umbraco well organized we will create a new folder:
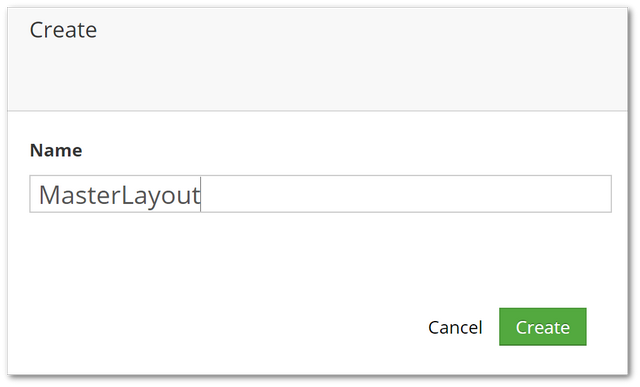
This folder is where you will add all your base document types. In this example, I name the folder master as I'm only planning on creating one master document type. Other good names for the folder would be, global, or shared. Use whatever makes you happy 🙂.

After creating the folder, it is time to create the master document type. This document type is going to be the base template that all other document types inherit from:
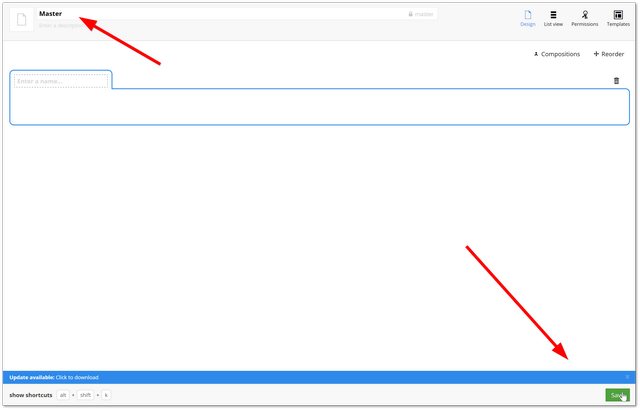
I want to have a page title property that can be used in the head section on all pages. I want this property to be common on all of my document types. This is why I am adding it to the master document type. Make sense? After creating the title property, click save:
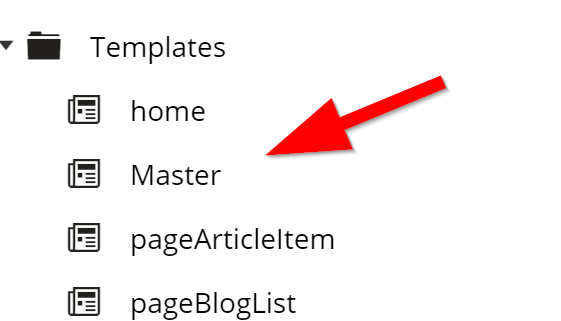
Clicking save in the editor will not only create the new document type within the Umbracos database, but it will also create a corresponding view file in the view folder in the webroot and for a Umbraco template. In case you are still unsure about what a template is, it's the thing that defines the HTML. Templates relate to MVC views. Instead of writing some custom HTML, for this guide, for laziness and speed, I'm going to copy the basic template HTML from the bootstrap site, which is available from this page, within the basic template section, here and the CDN links here.
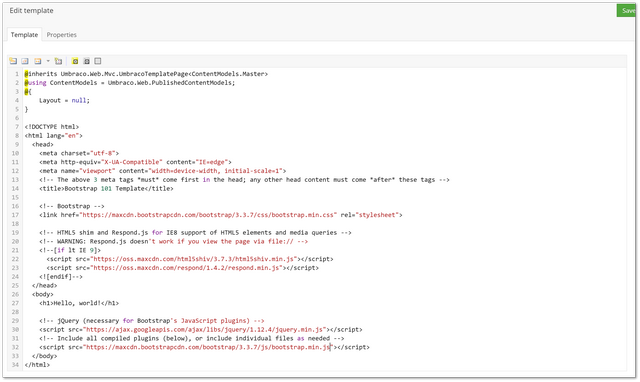
For your reference, I'll include some example HTML that you can copy and paste to help you get going. Notice the important past here is a call to RenderBody(). This code snippet will get the associated page HTML and injected it into the layout when the page is being rendered (we will create a page shortly 😉).
We now have a master document type, next, we need to create a page document type with a corresponding template. For this example, I will create a document type called homepage
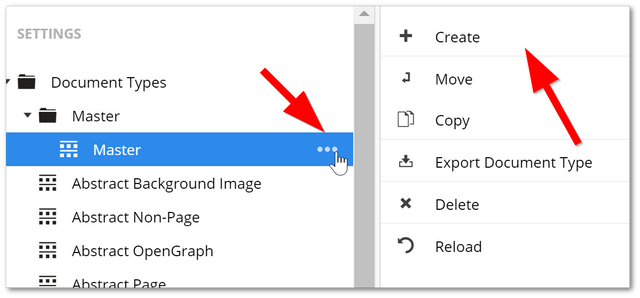
Still keeping within the Umbraco Document Typesfolder, right-click on the master document-type and from the context menu select Create. Create a new document type and call it Homepage. You can leave most of the settings empty for now:
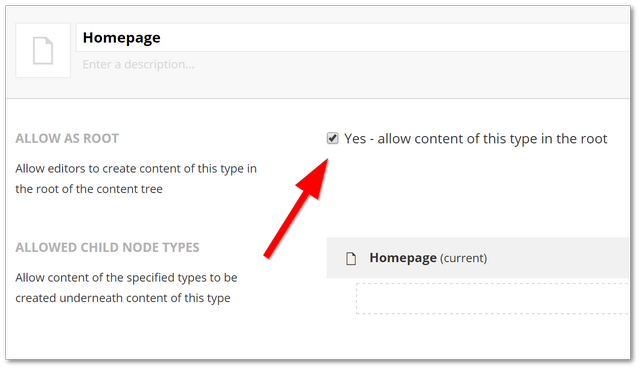
Make sure that the option 'Allow As Root' is enabled. This option will allow you to create a page using the homepage document type underneath the root node in the content tree. This is important, otherwise, you will not be able to create a page later on 😣.
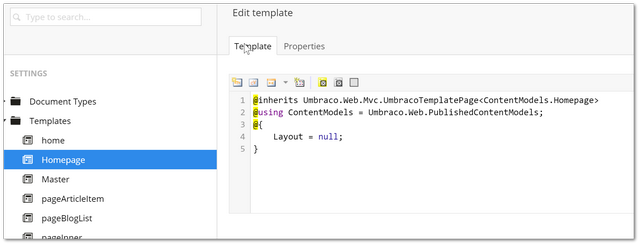
With the homepage document type created, if you look in the Templates area in the CMS again, you will see a corresponding 'Homepage' template has also been created. If you open the template, an HTML editor will load that will allow you to add HTML to the template. Notice that the layout property is set to null. We will now change this to use the master layout we created above.
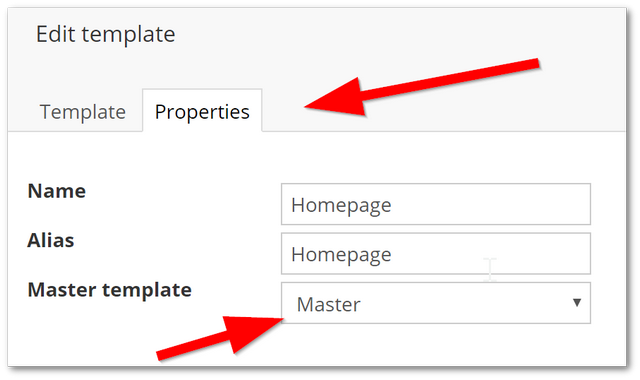
In the Properties tab, see the Master template selector is set to the master document-type you created. Do not forget to click the 'Save' button after adding any HTML:
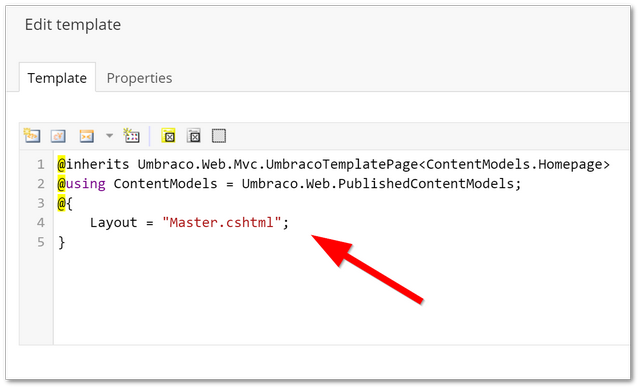
When the page refreshes, you should now be able to see that the layout property has been set to the master template!
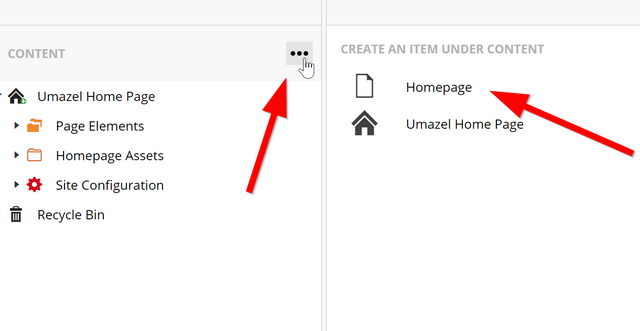
Next, we will create the home page in the content tree. Within the Umbraco backend, go to the Content section on the left-hand side menu. Right-click on the Content menu item and you should now be able to select the homepage document type you just created. Create a new page using this document-types and set it as the home (see, How To Set The Start Page In Umbraco 7. Publish the page so it goes live!

When you view your website on the root domain e.g. www.websiute.com a page should now render. That is everything you need to create a master document type and an associated child document type 😀. You are now one step closer to becoming a Umbraco ninja 🌪🌪🌪. Happy Coding 🤘
