In this tutorial, you will learn how to clear the cache within a Umbraco CMS powered website. A client that I recently started working with had a lot of gripes with their Umbraco 6 website. Whenever one of the content team tried to create a new page, or upload a new image into the CMS, a lot of strange 404 errors would always occur. These errors would continue to happen until the site was reset in IIS. After some investigation, the cause of the issue configuration. Someone unfamiliar with configuring Umbraco had misconfigured its load-balanced setting 😞.
Instead of making the required load-balanced changes in umbracoSettings.config and the web.config, they simply copied the default webroot onto two servers and left the site to run. This resulted in a lot of Umbraco cache issues and database conflicts (If you are reading this wanting to set up Umbraco in a load-balanced format, I suggest you read this tutorial)It took a while to fix the errors so I became a Umbraco cache clearing guru 🧘🧘🧘. In this tutorial, you will learn how to clear the cache.
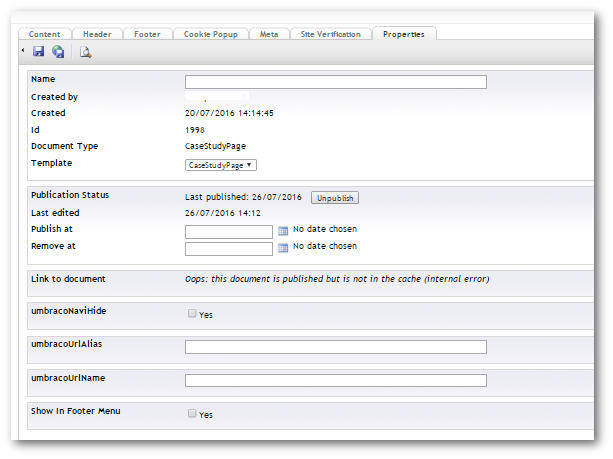
The obvious way to reset the cache is to perform an IISRESET. Turning the webserver off and on will reset everything. You can also recycle the application pool for a less intrusive reset process. In my situation, I had a load balancer and as you can see from the screenshot below, this site had a lot of 'Oops: this document is published but is not in the cache (internal error)' errors. This issue was not fixable from a reset:

To fix these types of issues, republishing the site on each node in your load balancer will work. There is a special hidden republish screen you can access to do this. Add the below URL to your website URL:
/Umbraco/dialogs/republish.aspx?xml=true
This will load a special republish screen:

From this screen, all you need to do is press the Republish Entire Site button. This will clear the cache and republish the site. If everything went successfully, you should see this nice and friendly success screen.

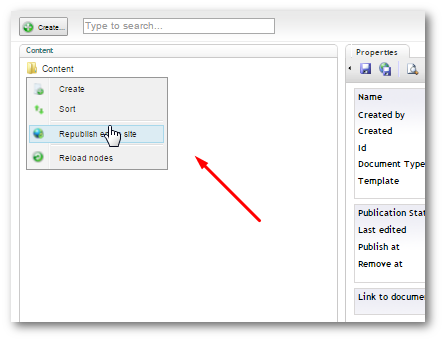
The other way to access this feature is via the content editor. If you right-click on your top-level node you should see a republish entire site option:

This process is exactly the same as the one above. The benefit of creating a shortcut is that you can set a shortcut up for each node in your load balanced environment and you can quickly and easily update the cache on all nodes in the event of something bad occurring.
Clear the Umbraco Examine Logs
If you have issues with the cache you may also want to clear your search index. Umbraco uses a module called Examine to provide basic search capabilities for developers to use. Under the hood, UmbracoExamine wraps the Lucene search index to work with Umbraco. Lucene will index your web pages and store the results on disk. Using Lucene and a file-based search index will greatly improve site performance and search capabilities, however, it can be a source of cache issues. If you create a page and it does not get indexed it will not appear in the search results! Sometime you need to clear the indexes to force a rescan. To do this in Umbraco you will need to delete the Lucene indexes. These files can be found here:
App_Data ➡ Temp ➡ExamineIndexes
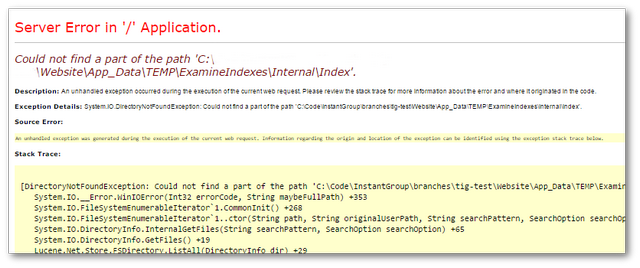
To delete the indexes, simply delete the files from disk. After you delete the files, you will need to restart your website in IIS. If you don't you might get this error:

As soon as you restart the environment, your search should start working again. These are the main ways to clear the cache in Umbraco CMS. Happy Coding 🤘
