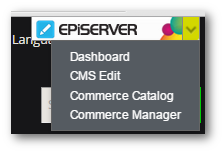
Within this tutorial, you will learn how to customise the Episerver quick-navigator menu. With the release of Episerver 7, came the new Quick Navigator Menu. The quick navigator menu will be displayed at the top of any web page when a content editor is logged into the CMS:

To make this menu appear on your site, all you need to do is add an Episerver specific tag within your global layout:
It is also possible to add custom menu items to the menu. Adding project-specific shortcuts can make content editor lives a little easier. Adding a new menu item is pretty simple so this is something I recommend that you implement on all your Episerver CMS-powered projects. To create a new menu item, create a class that implements the IQuickNavigatorItemProvider. This new class also needs to implement the ServiceConfiguration attribute, like this:
Next, you need to implement the GetMenuItems() method. GetMenuItems() needs to return a list of items of type IDictionary. In this method, you simply create a list of type IDictionary and within that list, add any custom menu items you want to appear as items of type QuickNavigatorMenuItem. Below shows an example of how to add a link to the start page.
That's it. Menu custom menu item added 💥. Happy Coding 🤘
