In this tutorial, you will learn how to create all the HTML required to render a web page within an Umbraco CMS powered website. Contained within this guide is everything you need to create a webpage and make it look pretty ପ(๑•ᴗ•๑)ଓ. If you are trying to learn how to get started with Umbraco CMS, this is the tutorial for you 🔥🔥🔥
In order to know how to render a view, you need to understand document types and templates. Document types are the content modelling building blocks within Umbraco (you can learn more about them here). The document types you create within Umbraco and the properties you add to them, will define what content editors can do within the Umbraco backend. Document types allow editors to add content in the CMS, we also need web pages to render that data 🖼️
In order to render CMS content you need to learn about templates. Umbraco is built on top of the ASP.NET Framework. To render web pages in ASP.NET framework we use the MVC pattern. The HTML is rendered within a view. A view is a file normally found within your projects View folder that has a cshtml extension. Umbraco does not use the phrase view, instead, a view with a cshtml extension is known as a template. Each page-level view you create will need to be associated with a document type.
You can see the available templates within a Umbraco website either from the webroot View folder or from within the CMS. To review a template within the Umbraco backend, go to this screen:
Settings ➡ Templates
This page should look like this:
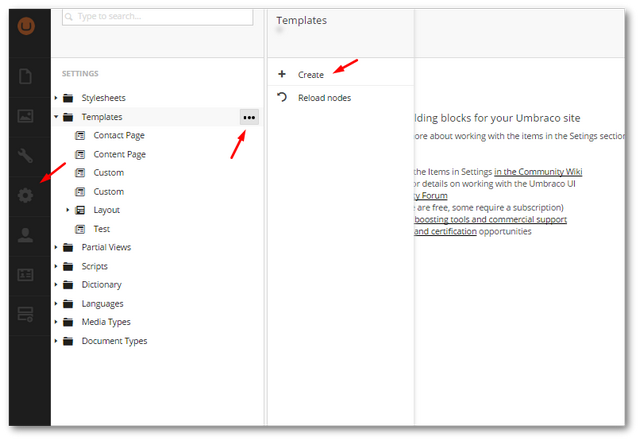
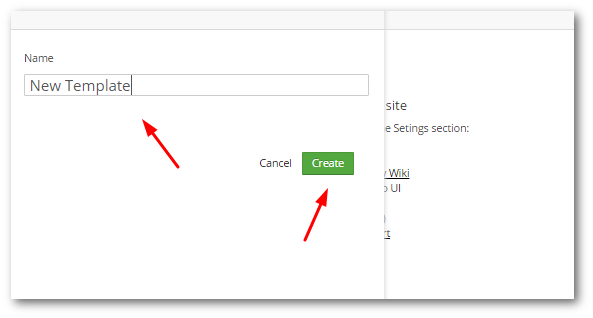
Here you can create a new template by selecting the ellipse next to the templates folder and selecting create:
There are two ways to render pages in Umbraco, one approach uses route hijacking, the other approach renders the view directly. I recommend you use route hijacking, however, today we will focus on rendering a view directly as it makes learning Umbraco a little easier.
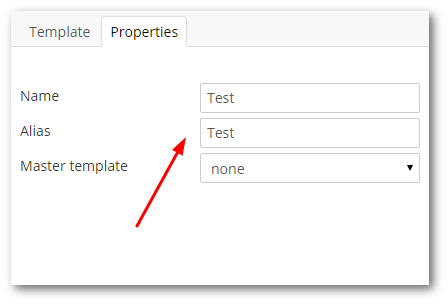
To associate a view with a document type, the name of the view should mirror the alias of the document type. After you have created a template, you should see a text editor that will allow you to add HTML and CSS to the template. From this editor, you can define how the view will render when called.
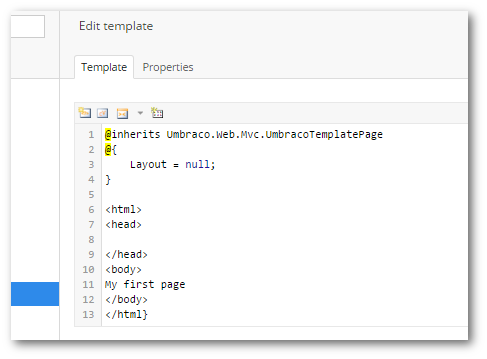
The HTML looks like this:
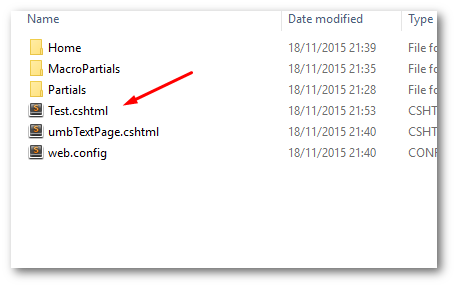
When you create a template from within the CMS, a matching view file will be created, in the View folder within your website's webroot.
If the name of the view does not correspond to a document type alias you will encounter a 404 error:
Manually Assigning A Template To A Document Type
Sometimes the mapping between a view and a document type does not automagically hook up. This is why after creating a new view within the CMS you should always check it is linked correctly. To link a view to a document type, go to the Document Type section in the backend and select the document type you want to associate the template with. Associating a template is done within the Info tab:
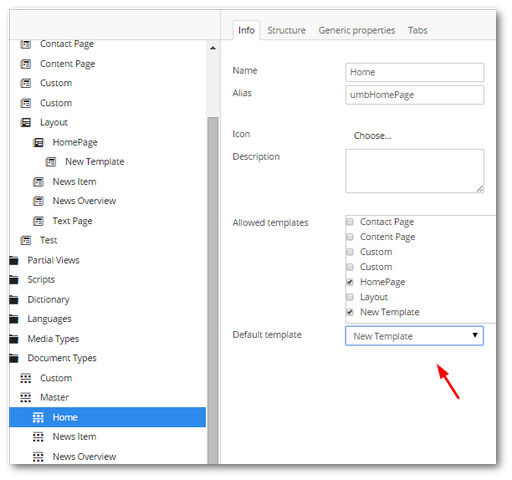
You set the view from the Allowed Template field. If your template has been configured correctly this field should not be empty and you should see your view referenced from here. Underneath this field, you also have the Default Template section. The default template is the one that is automatically associated with a page whenever a content editor creates a new page. With a view associated with the document type, the page should now successfully render on your site 😊
Changing An Existing Pages Template
If you want to change the template on an existing page, go to the Content section in the Section menu and select the page you want to update:
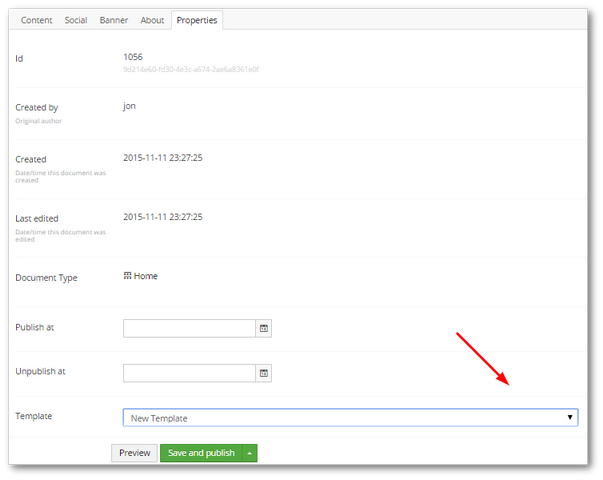
Navigate to the Properties tab and find the Template section at the bottom. Remove the existing template and then select the new template you want to associate with the document type and hit the 'Save and Publish' button 💥
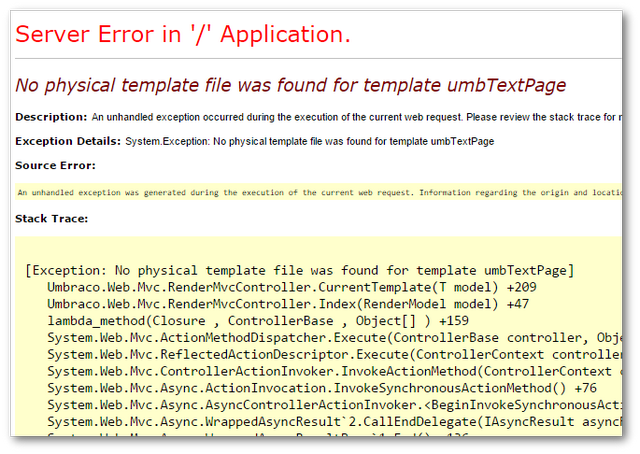
If you encounter any problems creating a view from within the CMS, you can always go into Visual Studio and create it manually. You will know if a view doesn't exist or a document type has not been set up correctly, as you'll see a No physical template file was found for template umbTextPage error when you try and browse the page:
When you create a template in Umbraco, it will not be automatically added as a project item within your Visual Studio solution. You will need to manually include the view with your VS project, otherwise, when you deploy your site for production, it will be missing. To do this within Visual Studio, enable the Show All File option within Solution Explorer, go to the View folder, find the view file, right-click on it and select Include in the project. If you can not find the file refresh!
TIP: If you bump into rendering issues, it can be useful to check if your website is set to run with web forms or MVC. You can make this check within umbracoSettings.config. Go to the defaultRenderingEngine setting and you should see something like this:
Job done 💥
In Umbraco, templates are used to render a web page in Umbraco CMS. I recommend you use route hijacking with Umbraco, however, this is not mandatory. If you do not want to use route hijacking, you can create templates directly within Umbraco. As you know now, assigning a view to a document type is easy. Happy Coding 🤘
