In this tutorial, you will learn how to install either Umbraco V7 or v8 using Visual Studio and the Umbraco [NuGet](https://www.nuget.org/packages/UmbracoCms/ package). Like the majority of good ASP.NET Framework applications, you can install Umbraco via NuGet. I think installing Umbraco via Nuget is the best option as Nuget will automatically set up your Visual Studio project for successful and optimal development. Installing Umbraco via NuGet will also mean that when Umbraco releases new patches of the CMS, upgrading to them will be much easier 😍. If you want to learn how to install Umbraco in under 10 minutes, read on 🔥🔥🔥
For reference, it is also possible to use the Microsoft web installer to install Umbraco. If this sounds interesting to you, read this and How To Install Umbraco 7 Manually.
Creating A Blank Website
The first step is to create a folder on your PC to store the project files. After you have done that, open up Visual Studio and click:
File ➡ New Project:
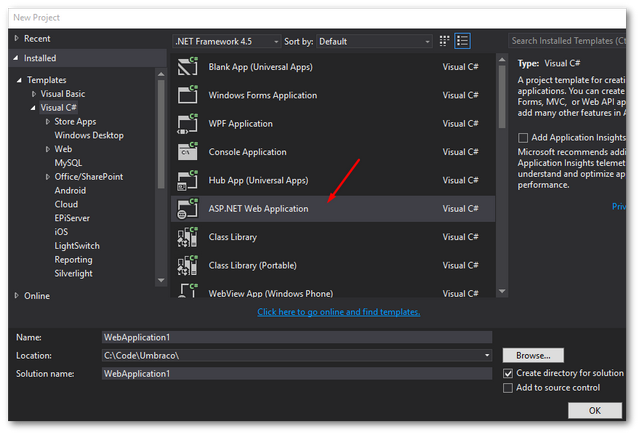
This will present you with this screen:

Create a new project of type ASP.NET Web Application. name it whatever you want. DO NOT USE THE .UMBRACO IN THE PROJECT NAME. When you use .Umbraco in the name, you will encounter this error:
With the project created and loaded within VIsual Studio, it's time to add the Umbraco NuGet package. Open up your Nuget explorer,:
Tools ➡NuGet Package Manager ➡ Manage NuGet Packages For Solution
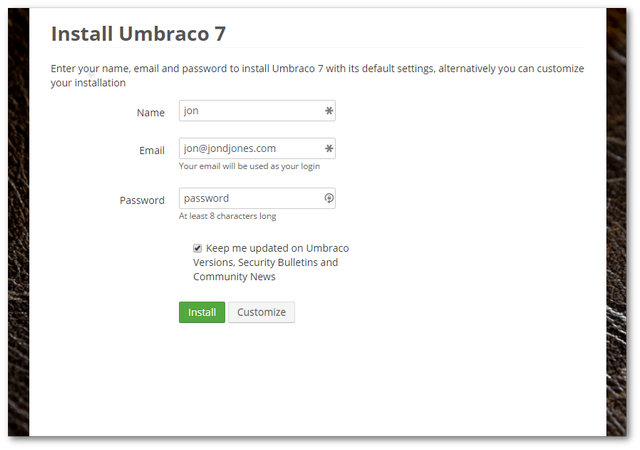
From here, search for Umbraco. You need to install the UmbracoCms package. Select it and install it. It's important you agree to the override prompts that will flash up. After the Umbraco CMS package installs, you will need to run the Umbraco installer. To launch the installer run the website. You can do this within Visual Studio with Cassini, by hitting F5. You can also create a new website in IIS and point it to your website's webroot. I 100% recommend when developing a website using Umbraco to access it via IIS. Having to launch the VS debugger every time you make a dev change is very inefficient. I tend to set up IIS after installing Umbraco and not before. When you run your site for the first time, in the web browser the Umbraco installation wizard should load 🧙🧙. The first thing you will be asked to do is add a username and detail for the admin account. This will be the account you use to log into Umbraco, so don't forget it other you will be locked out!

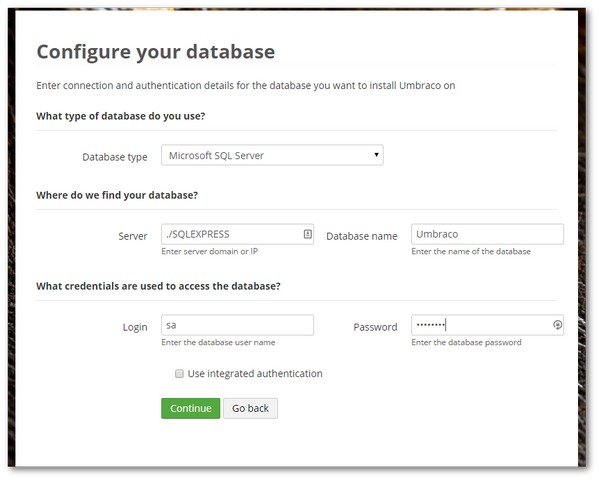
Before you hit install, you have two options. First, you can use the default installation settings. This will install the Umbraco data using a SQL Lite database. This database will live as a file in your websoot. The files will be stored within your App_data folder. A more preferable option is to install the database within a SQL server. I won't cover the details of configuring a local SQL server in this tutorial as it's quite well documented. The gist of it is that you will need to allow remote access. You will need to create a blank database. You will need to set up a SQL account that your website can use to access the database. On your developer machine, I suggest you use the SA account which is MSSQLs default admin account. Hit the customize button to add in your database preferences.

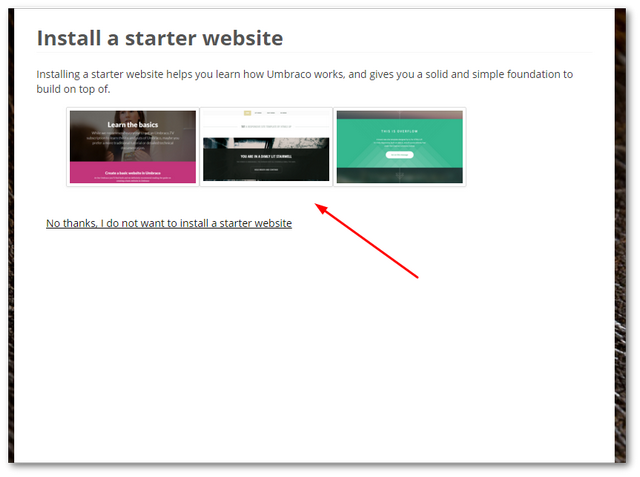
If you have a blank website with the correct SQL details the installer will continue. If SQL is not configured correctly, the installer will complain that it can't talk to SQL. If you encounter this error, you need to look in SQL, not Umbraco. After you have everything set up correctly, you can continue with the installation process:

When the installer completes, you should be able to log into the CMS using the admin account details that you specified during the installation process. You can access the editor by postfixing /umbraco to the end of the Url.
After installing the CMS, I recommend you configure IIS. If you want more information about this process, I've previously written about it here.
There you have it. Installing Umbraco 7 is very easy in all flavors, whether you use the installer, manually install or it use NuGet. Personally, I prefer to use Nuget as you also get all your visual studio files set-up. Happy Coding 🤘
