In today's guide, you will learn how to install the Umbraco forms plug-in within Umbraco v6. I'm going to cover the process of creating your first form using Umbraco Forms (also known as contour). This guide is not a Umbraco forms installation guide. For this post, I'm assuming you have installed Umbraco Forms. If you haven't, I have written an instal guide here. I recommend starting there first. Assuming you have the plug-in installed, let us create a form 📝📝📝
Creating A Form
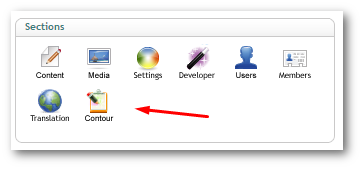
In the Umbraco backend, open up the Contour dashboard. YOu can do this by clicking on the 'Contour' icon:
You can create a form from the dashboard:
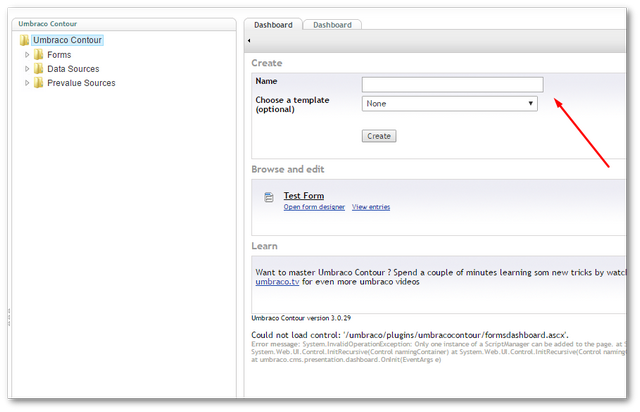
In the create section, add in the name of your form, e.g. 'Main Contact Form' and click the Create button:
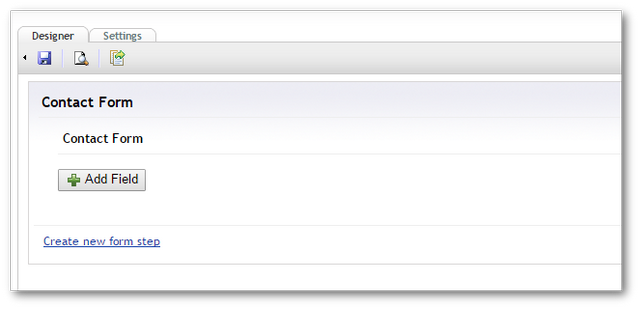
This will take you to the form editor. This is the area where you will create and customise your form:
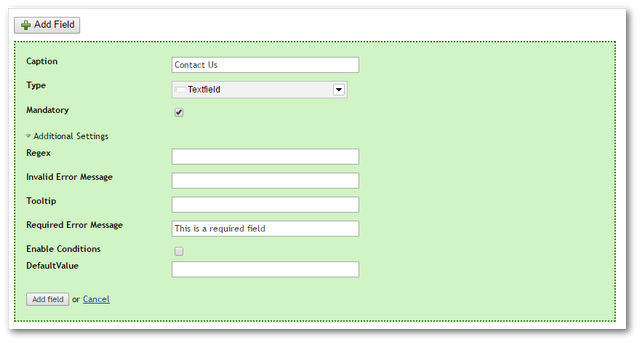
Here you can create and order the elements that will make up the form. A field can either be of type:
CheckBox
CheckBoxList
DatePicker
DropDownList
File upload
HiddenField
Password Field
RadioButtonList
Recaptcha
Textarea
Textfield
For each field you can add different properties to it like:
Caption
Mandatory
Regex
Invalid Error Message
Tooltip
Required Error Message
Enable Conditions
DefaultValue
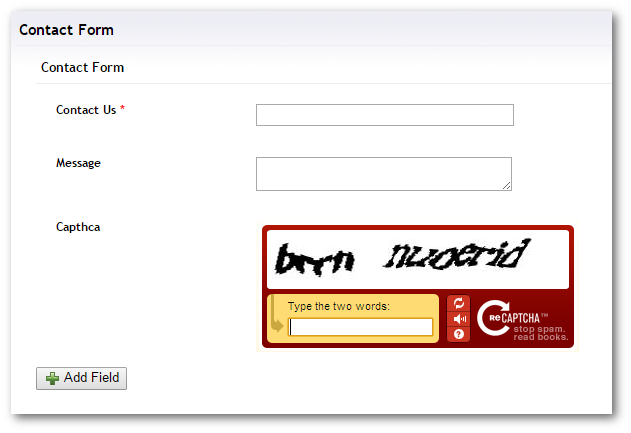
In this example, I have created a simple form with an email address, a message and a captcha:
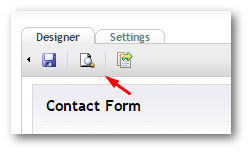
You can preview what the form will look like, using the preview button. Before you publish the form, remember to set the email address where the form should be sent. To do this, click the Workflow button from the toolbar:
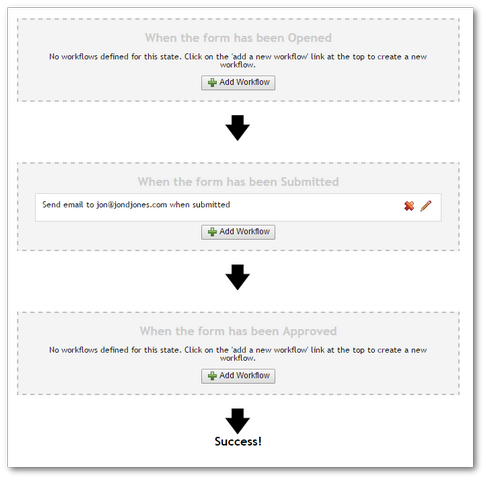
The default workflow will use the email address you registered when you created your Umbraco account. Emailing is not the only form completion option. Instead you could choose to get the form submissions data via:
Post as XML
Post form to URL
Save as file
Save as Umbraco document-type
Send XSLT
Now you have a form set up and the workflow to send, store, or save the data, the last customisation you might want to do is in the Sections tab. In here you can add validations:
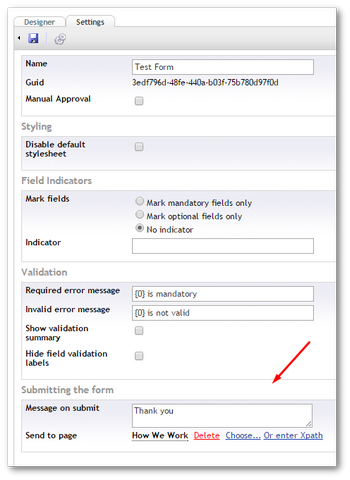 Validations you can apply to the form, include:
Disable default stylesheet
Mark fields as mandatory, optional fields only
Set the required error message
Set the Invalid error message
Show validation summary
Hide field validation labels
I find the most useful option is the option to decide where the user will be redirected on form submission 😍
Displaying a form on a page
Now you have created a form, you need to add it to a page. In this section, you will learn how to do that!
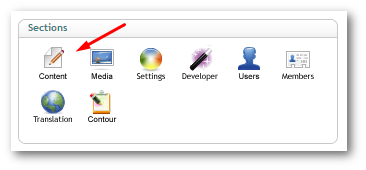
In the backend go to the Content' section and navigate to a page you want to display a form onNOTE: The document type that you pick will need to have a property of type TextArea:
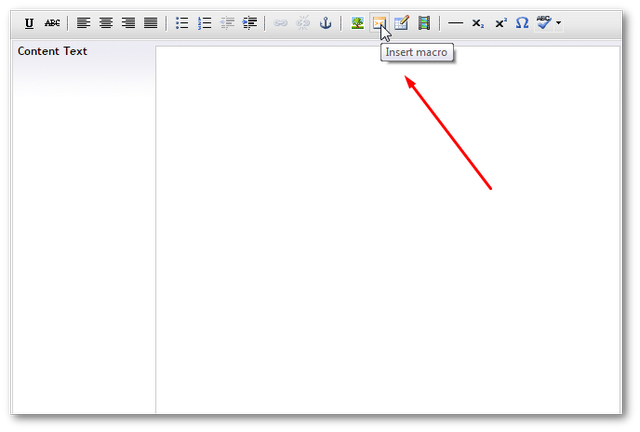
In the text area property where you want to render the form, in the TinyMce toolbar click the Macro button.
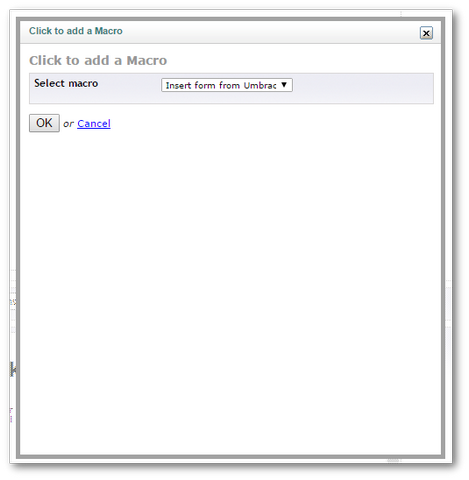
From the Add Macro dialogue, select Insert Form From Umbraco Contour
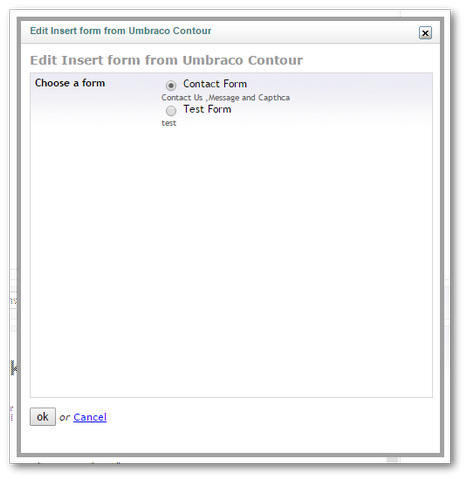
From the 'Insert Form' dialogue, select the form you created above.
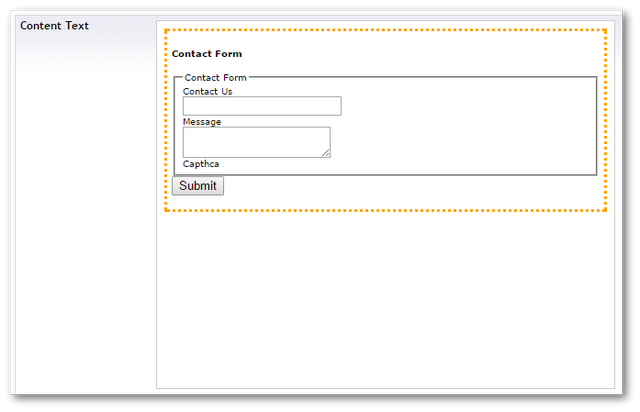
After saving the page, you should see a preview of the form in your content area. If you click the `Publish button you should now see the form appear on your site ready for testing:
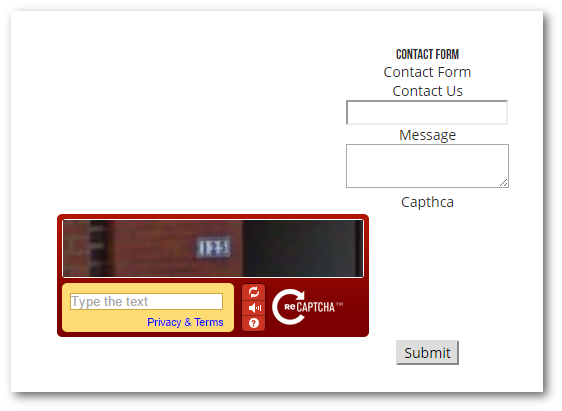
The example obviously needs styling, however, the steps above show how versatile and easy it is to start displaying Umbraco forms onto your website. Happy Coding 🤘
