In this tutorial, you will learn how to start writing log file data within a Umbraco CMS-power project. In every project that you work on, it is essential to have a good strategy to help you debug issues easily and efficiently. Writing useful messages within a log is an essential part of that process. Umbraco ships with a great logging package called Log4Net. In this tutorial, you will learn more about Log4Net, including how you can extend it to improve your websites logging capabilities. If this sounds of interest to you, read on 🔥🔥🔥
Installing Log4Net
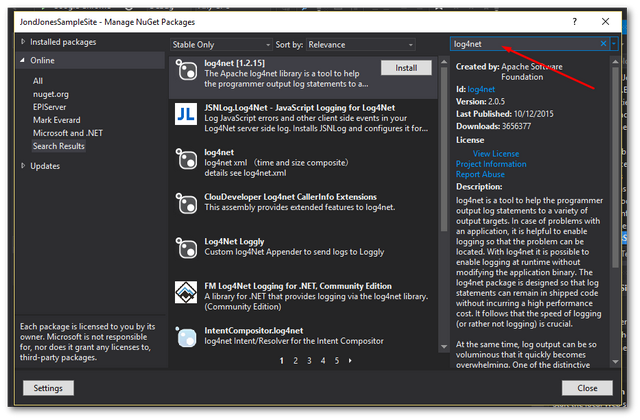
If you install Umbraco via Nuget, the installation process should install Log4Net automatically for you within your website project. If you use custom class libraries within your solution, you may need to manually install Log4Net within these additional projects. Installing Log4Net takes minutes and is very easy. Open visual studio, go to:
Options ➡ NuGet Package Manager
Make sure you search the online packages and search for Log4Net:

After you have installed Log4Net, you will likely want to configure it for your needs. To do this, open up your web.config. If your web.config does not have a Log4Net section you will need to add one. The Log4Net section can go anywhere within the configuration node. Add the following section:
Umbraco comes with a default logging appender. This appender will write all the Umbraco log files to a log file within the /App_Data/Logs/ folder. It is possible to create your own custom log appender and configure to your needs. Creating an appender means you can write your own custom logs in a new file separated from the Umbraco ones. The configuration below will create a new appender called FileAppender.
This appender has been set to write the log files to a custom location. In this example, we will set the log files to be created within a folder in the C drive:
Now that you have Log4Net installed and configured within your project, it is probably worth covering how you can use it to write data to a log file. To use Log4Net within a class, you need to create an ILog instance. To create an ILog instance, you use the LogManager, passing in the current classes type. The type is used when logging. Log4Net uses the type to automatically set the log messages source. When the shit hits the fan and you need to start tracing your error log, knowing which class generated a log will make your life so much simpler 😊
To create a log instance, we use the code below:
After you have aILog instance, you are ready to log! There are several logging options available to you. First, you can log an error:
When undertaking a new project, it is very easy to log too much data. If you log too much your log files can get bloated. When things go wrong, bloated log files can prevent you from quickly finding useful information. I have worked on projects where it is impossible to find useful information as the log files contain too much noise. You look in the log file and see thousands of entries, how do you find the errors that relate to the outage?
To deal with this problem, Log4Net provides us with different logging levels, make use of them. You have Error, Warn, Info and Debug. By default, not all of these logs will be created. For performance, Log4Net is usually only configured to write Error and Warn messages to the logs. If you encounter an error on your site and the logs are not giving you enough information, you can redeploy your website and enable more detailed logging. This way you get a good mix of less noise in the logs and good performance.
To further configure Log4Net within an Umbraco website, look in the config folder in your webroot. Within here you should see a file called log4net.config'. This file contains all the Umbraco Log4Net configuration settings. From this config file, you can change the logging level. In a normal everyday working environment, it is recommended to only log errors. When you're trying to debug your website, you may want to change this setting to also include logs that have been written as either information or debug. In Log4Net you can write Log messages using the appropriately named Log() method:
You can write debug logs, using this code:
Use Info when you want to log information about the program and Debug for logs that will help you track down why your website isn't working. It is important to use the different logging levels so can more easily filter things later on. It is also possible to change the logging level via code using this snippet:
