In today's guide, you will learn how to set up TDS with package deployment within a website powered by Sitecore CMS. In Sitecore, when you want to copy content from one instance into another, you can use something called a package deploy. Package deploy is not the only way to copy data between Sitecore instances, however, in certain companies, it might be the only viable approach. If you have limitations around the IT network, copying data over HTTP might not be possible. Instead of automatically deploying content, you can create a Sitecore deployment package that can be run on any server. This post assumes that you have some knowledge of TDS. If you are new to TDS, I recommend reading this tutorial first!
Package Deployment Prerequisites
First, you need to make sure that you have your build configurations set up for each of the environments that you want to create packages for. You will need to fill in the associated Build configuration options within the TDS config screen which is accessible within Visual Studio:
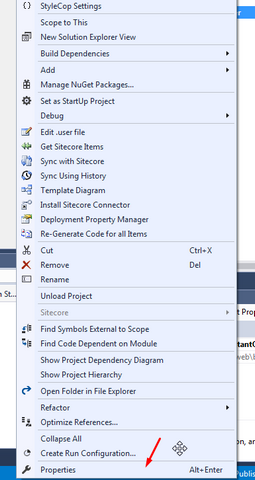
To access the screen, in your solution, right-click on your TDS project and in the context menu, select Properties. Go to the Build tab:
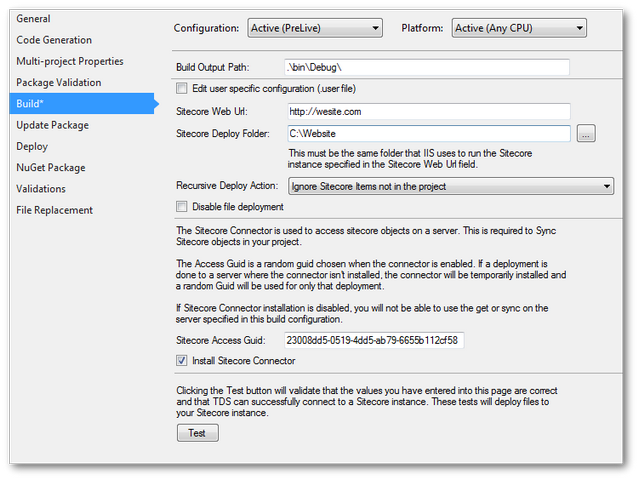
From the build configuration screen, you will need to set the correct configuration for each build type. To switch between types, in the top Configuration dropdown, select your build type (out-of-the-box Visual Studio will ship with Debug or Release). In here, you need to enable the Install Sitecore Connector and then add in the Sitecore Url for the website (this will vary for each environment) as well as a location for the plugin to deploy the files to. This is done by setting the Deploy Folder property. This folder should not be the websites webroot, instead select an empty folder somewhere on your PC. As a tip, use the Test button to check that you are happy with everything before creating a build package. You now have a way to create deployment files 🔥🔥🔥.
Configure A Package
For each environment, you want to create a deployment package. In the TDS properties, go to the Update Package tab.

To enable TDS to generate a package, tick the 'Generate package during build' checkbox. I prefer to get TDS to append a DateTime to the filename of the package to make it easy for tracking. I also recommend enabling the Append the current date and time to the package name option. The last step is to point TDS to a folder on your machine that contains some Sitecore assemblies. TDS needs access to these Sitecore assemblies in order to create a deployment package (you can get these from a blank Sitecore instance install):
Sitecore.Kernel.dllSitecore.Logging.dllSitecore.Update.dllSitecore.Zip.dll
Creating A Package
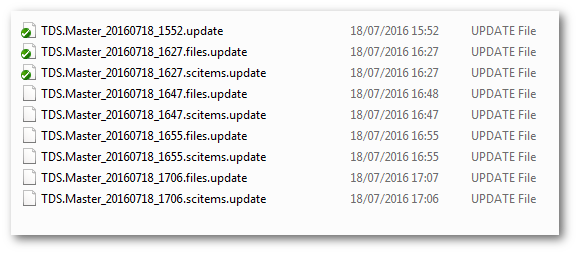
This is the simple bit. With the appropriate build configuration set within Visual studio, build your solution. In your TDS projects bin folder, you should see a matching folder name for the build configuration name. If you built the site using Debug, there will be a folder called Debug, d'uh! If you look in this corresponding folder, you should be able a deployument package:
Installing A Package
To install a package you will use the upgrade wizard within Sitecore CMS. To launch wizard, add /Sitecore/admin/UpdateInstallationWizard.aspx after your website domain in a browser (make sure that you are logged in), like so:
http://local.website.com/sitecore/admin/UpdateInstallationWizard.aspx
Use the installer to upload the package and install it:
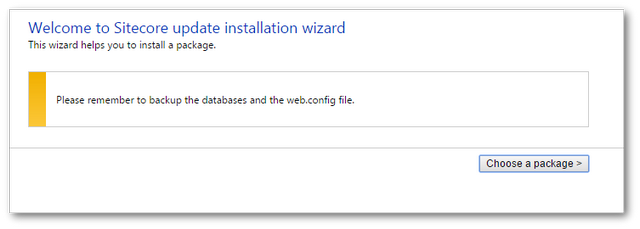
Job done 💥💥💥
Generating Some Code
When importing a deployment package, if everything is set up correctly TDS and Glass Mapper can be used to generate some code for you:
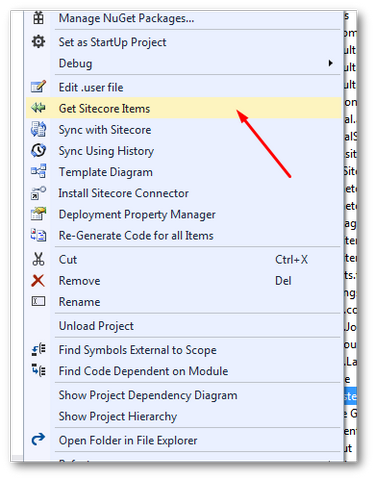
To get started, right-click on your TDS project and select Get Sitecore Items:
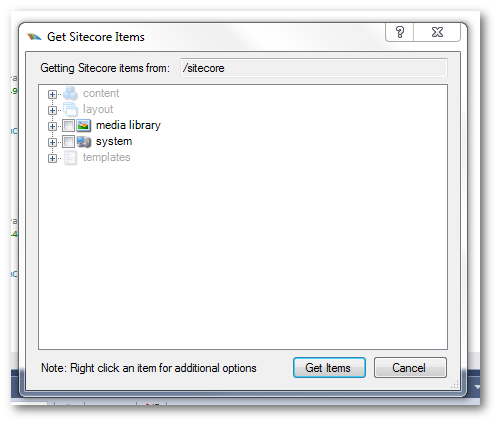
Here you should be able to see the 'Get Sitecore Items' dialogue. TDS and glass mapper will create code for any templates that have been imported. Remember to manually include any generated files within your project. Have a look in your TDS generated model class and you should see an interface and a model for each template you've imported. Happy Coding 🤘
