In this tutorial, you will learn all the steps that will be required to build a page within Sitecore and render it using the ASP.NET MVC framework. In order to build a page within Sitecore, you will need to create a placeholder. Pages within Sitecore are built from renderings, so you will learn to create and register these components within Sitecore. Finally, I will cover the steps a content editor will need to follow in order to add a rendering onto a page. If you want to learn about how to master MVC with Sitecore, this is the tutorial for you 🔥🔥🔥
TIP: If you are new to Sitecore and want to learn more on how to get started, I recommend reading How To Create A Sub Layout and Add It to a Page in Sitecore. This tutorial explains how to create a page using ASP.NET web forms. By going through the process with a different perspective, you may learn more 💥
Sitecore Renderings
Renderings are the way developers can render a page or a part of a page within Sitecore. Sitecore ships with many different types of renderings, however, when working with MVC, the two main renderings you will be working with:
View Rendering: A view rendering can be used for components that have no, or very close to no, logic in it. A view rendering is like calling a partial view in vanilla MVC. A view rendering will not have an associated MVC controller. View renderings are created by defining a view with a
.cshtmlextension. You then need to register the rendering within Sitecore.Controller Rendering: A controller rendering, as the name implies, has a controller and subsequently needs a little bit more configuration and code. Controller renderings give you a lot more power. This is why I recommend that you favour controller rendering when building a site within Sitecore. The rendering we will create in the tutorial will be fairly simple. It will display some text on a page using MVC. By following the same steps, you will be able to create much more complex and powerful renderings.
Building An MVC Architecture
In order to create a page using MVC you will need to create these classes and files:
Controller: The controller will allow you to hook into the request pipeline in order to run your own business logic:
View Model: The view model will be the object that will contain the data that will be passed into your view file:
View: The view is where you add the HTML:
Creating these components is pretty similar to creating an MVC page using vanilla MVC. The big difference when creating the rendering within Sitecore is getting the controller to fire. We will do this next 💥
Configuring Sitecore
First, you need to create a new controller rendering within Sitecore. Open the Sitecore Content Editor and within the navigation tree, go here:
Layouts ➡ Renderings

If you are using Sitecore 8 onwards, you can create a Controller Rendering by clicking on the imaginatively named Controller Rendering button. From this screen, you need to configure Sitecore to call your controller class. To do this you need to provide Sitecore with three things:
- The full namespace of the controller
- The controller class name
- The name of the assembly where the controller is located
In my example, the namespace is JonDJones.SiteCore.Mvc.Controllers, the class name is ExampleControlRenderingController and the name of the assembly is JonDJones.SiteCore.Mvc. The value that I need to add within Sitecore looks like this:
JonDJones.SiteCore.Mvc.Controllers.ExampleControlRenderingController, JonDJones.SiteCore.Mvc.
The next step is selecting which Action method Sitecore will call. In my code, I have a created default action called Index within the controller. Within Sitecore, I need to add Index:
Creating A Placeholder
To add renderings onto a page in Sitecore, we define something called a placeholder. You will add the placeholder to a layout. This then lets content editors pick what components they want to add to a page.
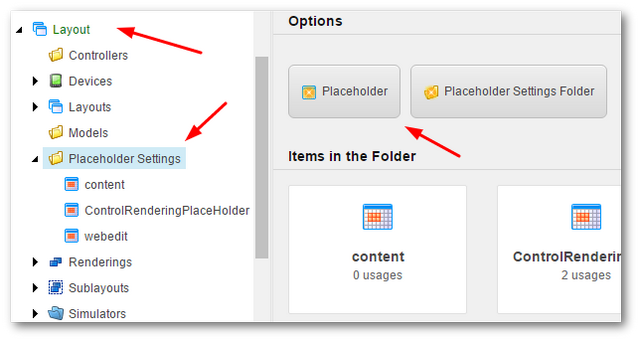
In the placeholder setting, in the Allowed Controls section. We need to add our new controller rendering. you can do this by first clicking on the Edit button:
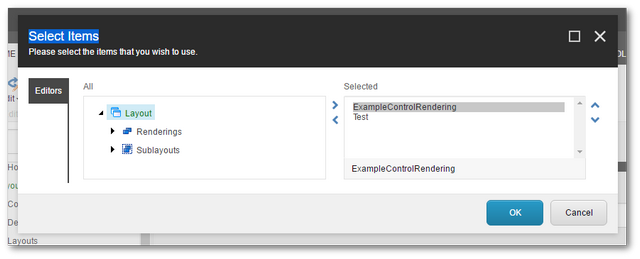
From here, you can define which renderings you want to allow content editors to be able to create within that placeholder. To add a control, select it and clock on the right arrow ➡ button. After you have added the control, click on the Ok button to save your changes.
We've created a controller rendering and we've added it to a placeholder so it can be added to a page. The next step is to add the placeholder to a layout to use.
Adding a PlaceHolder To A Layout
Next, we need to create a layout. To do this, within the content tree, go to this screen:
Layouts ➡ Layouts ➡ MVC Layout
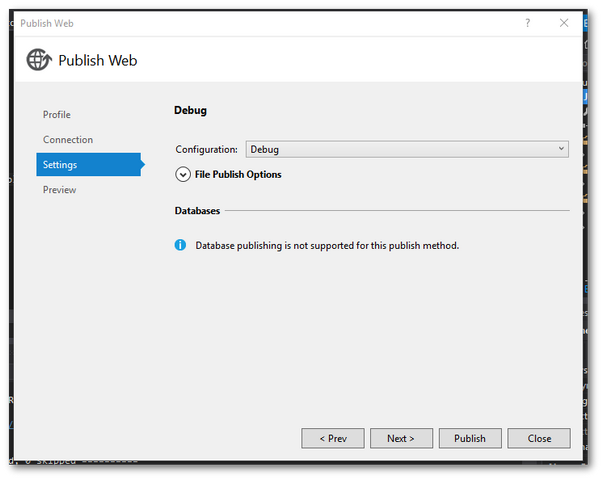
Name the layout whatever you want. I am going to call mine Home, original right? My layout will be created as a .cshtml view that will be located within the webroot view folder. The markup will look like this:
In this view, you need to add the placeholder required to render the controller rendering. Back in Sitecore, you now need to add a placeholder called controlRenderingPlaceHolder which will be of the type ControlRenderingPlaceHolder:
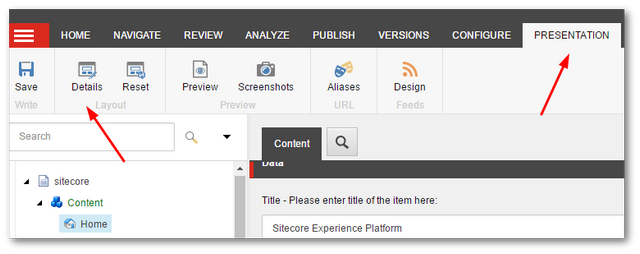
In the content section, pick a page to add the rendering. In this example, I'm using the homepage:
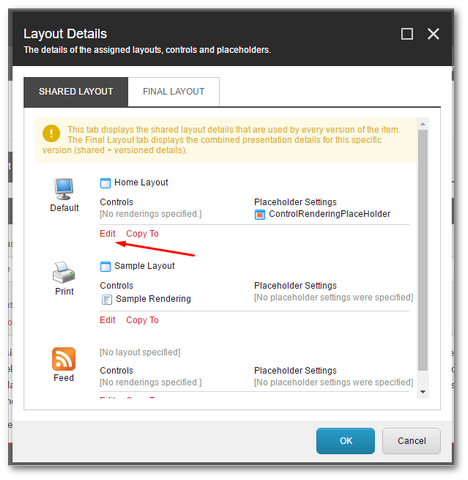
In the ribbon, click on the Presentation button and in the Layout section click on Details:
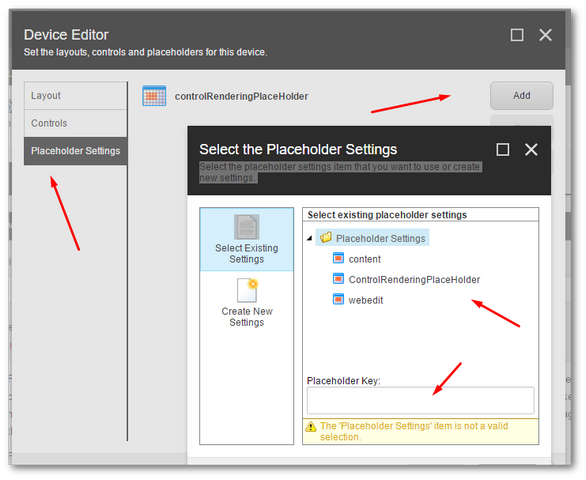
In the Device Editor, select:
Placeholder Settings ➡ Add
Select the ControlRenderingPlaceholder we created above, call it controlRenderingPlaceHolder. This value needs to be the same name as you used in the layout HTML. Next, publish the page:
Adding The Control Rendering To The Page
On the home page, in the ribbon open this location:
Publish ➡ Experience Editor
In the experience editor:
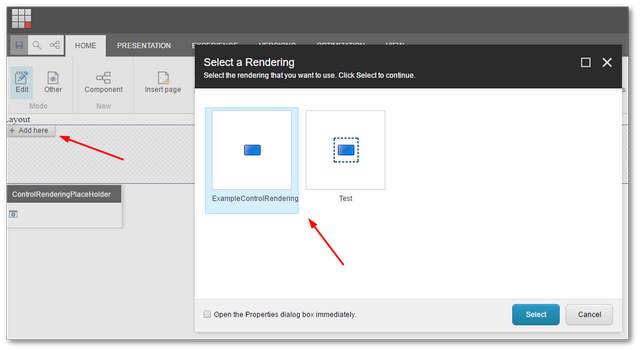
In the experienced editor, you should see the placeholder we defined above. In the top left-hand corner of the placeholder, you should see the Add here button. Click on it. In the list, you should now see the control rendering. Select it and job done! If everything has worked correctly, you should see the content being render on the page.
Troubleshooting Tips
If you try and add the control and you see the below error, it means something's gone wrong.
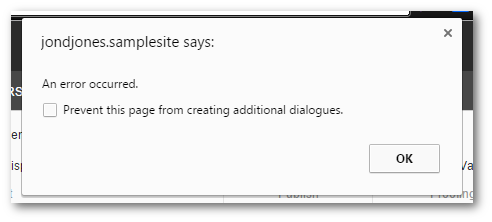
A good tip to try and troubleshoot the error is to look at the exception. Within your browser of choice, if you go here:
Inspect Element ➡ Console
Add the control again, you should see an error being rendered, like so:

If you click on the link you should be able to see the exception:

Happy Coding 🤘
